How To Edit Templates In CapCut: A Beginner's Guide For Aspiring Video Editors
Editing videos can feel overwhelming, especially when you're just starting out. But what if I told you there's an app that makes it super easy to create professional-grade videos? Enter CapCut, the game-changer in the world of mobile video editing. Whether you're a seasoned YouTuber or just someone looking to spice up their social media posts, learning how to edit templates in CapCut is a must-have skill. So, grab your phone and let's dive right in!
CapCut has quickly become one of the most popular video editing apps out there, and for good reason. With its user-friendly interface and a wide range of features, it's perfect for both beginners and pros. One of the coolest things about CapCut is its template library, which allows users to create stunning videos without needing a degree in graphic design.
But here's the thing – knowing how to edit templates in CapCut can take your video game to the next level. In this article, we'll walk you through everything you need to know, from basic tips to advanced tricks. So, whether you're looking to add some pizzazz to your TikToks or create a killer promo video, you're in the right place!
Read also:Where Do Cash App Cards Ship From The Ultimate Guide
Table of Contents
- What is CapCut?
- Why Templates Matter in CapCut
- Accessing Templates in CapCut
- Customizing CapCut Templates
- Adding Media to Templates
- Advanced Editing Techniques
- Saving Your Work
- Tips and Tricks for Template Editing
- Common Mistakes to Avoid
- Conclusion: Mastering CapCut Templates
What is CapCut?
CapCut is more than just an app – it's a creative powerhouse that puts professional-grade video editing tools right at your fingertips. Developed by ByteDance, the same company behind TikTok, CapCut has quickly become a go-to tool for creators worldwide. The app offers a ton of features, from basic trimming and cutting to advanced effects and animations.
One of the standout features of CapCut is its massive library of templates. These pre-designed layouts make it super easy to create visually appealing videos, even if you're not a design wizard. But here's the kicker – these templates aren't just static. You can fully customize them to fit your vision, making your videos truly unique.
Why is CapCut Popular Among Creators?
- Intuitive interface that's easy to navigate
- Free version with tons of features
- Regular updates with new templates and effects
- Collaboration tools for team projects
- Support for high-resolution exports
Why Templates Matter in CapCut
Now, let's talk about why templates are such a big deal in CapCut. Think of templates as your creative starting point. They provide a solid foundation for your videos, saving you time and effort while ensuring your content looks polished and professional. Whether you're creating a social media post, a music video, or a product demo, the right template can make all the difference.
And here's the best part – CapCut templates are designed to be flexible. You can tweak colors, fonts, animations, and more to match your brand or personal style. This means you're not stuck with something generic – you can make it your own. Plus, using templates can help you maintain consistency across your content, which is key for building a strong online presence.
Benefits of Using Templates
- Saves time and effort
- Ensures professional-quality results
- Allows for easy customization
- Helps maintain brand consistency
Accessing Templates in CapCut
So, how do you get your hands on these awesome templates? It's actually pretty simple. When you open CapCut, you'll see a dedicated "Templates" section. This is where all the magic happens. You can browse through a wide variety of templates, categorized by theme, occasion, and style. From birthday videos to travel vlogs, there's something for everyone.
Here's a quick step-by-step guide to accessing templates in CapCut:
Read also:Which Milk Is Better Enfamil Or Similac A Comprehensive Guide
- Open the CapCut app on your device
- Tap on the "+" icon to create a new project
- Select "Templates" from the options
- Browse through the available templates and choose one that suits your needs
- Tap "Use" to apply the template to your project
Where Can You Find More Templates?
While the app comes with a bunch of built-in templates, you can also access even more options by subscribing to CapCut Pro. This premium version unlocks exclusive templates, effects, and other advanced features. Additionally, there are third-party websites and communities where creators share their custom templates for free or for a fee. Just make sure to download from trusted sources to avoid any security issues.
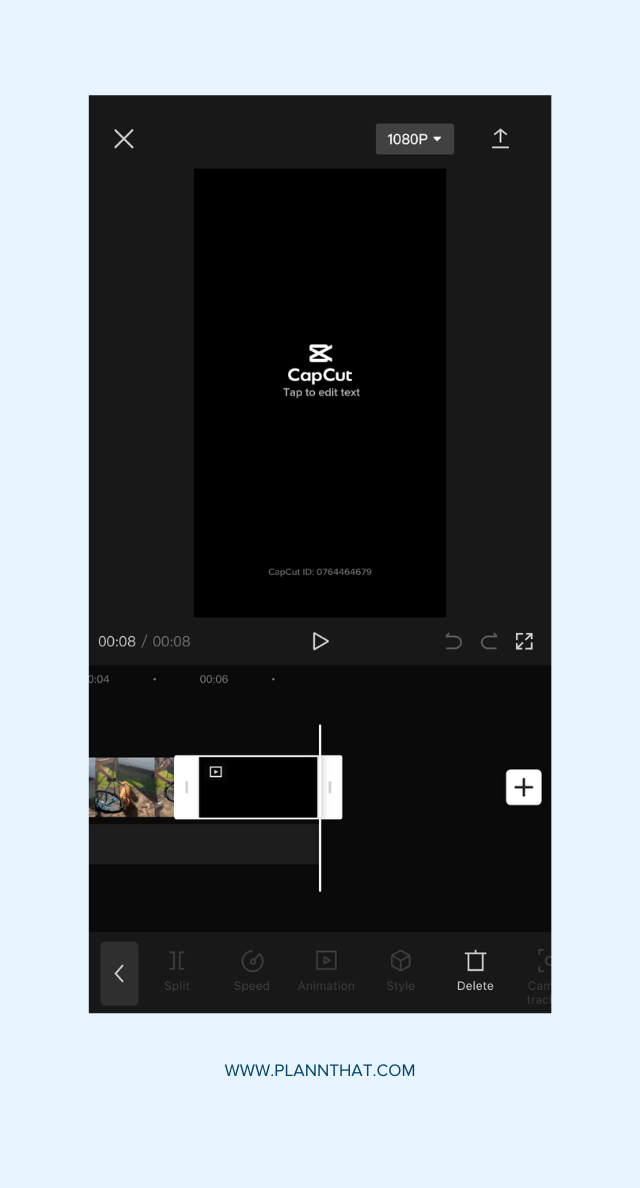
Customizing CapCut Templates
Now that you know how to access templates, let's talk about customizing them. This is where the real fun begins! Customizing a template in CapCut is as simple as dragging and dropping elements, adjusting settings, and adding your personal touch. Whether you want to change the background, swap out fonts, or tweak animations, CapCut makes it easy to do.
Steps to Customize a Template
- Open the template in your project
- Tap on the elements you want to edit (e.g., text, images, or effects)
- Use the toolbar to adjust settings like size, color, and position
- Experiment with different fonts and animations to match your style
- Save your changes and preview the final result
Tips for Effective Customization
When customizing templates, it's important to keep a few things in mind:
- Stick to a consistent color palette to maintain a cohesive look
- Choose fonts that are easy to read and align with your brand
- Don't overdo it with effects – subtlety is key
- Test different variations to see what works best
Adding Media to Templates
Once you've customized your template, it's time to add your media. This could be photos, videos, or audio clips that you want to include in your project. CapCut makes it super easy to import media from your device or directly from cloud storage services like Google Drive or Dropbox.
Here's how you can add media to your template:
- Tap on the "Media" tab in the toolbar
- Select the type of media you want to add (photos, videos, or audio)
- Browse through your files and select the ones you want to use
- Drag and drop the media onto your timeline
- Adjust the placement and duration as needed
Best Practices for Adding Media
When adding media to your templates, keep these tips in mind:
- Use high-quality files to ensure sharp visuals and clear audio
- Match the aspect ratio of your media to the template's dimensions
- Be mindful of copyright restrictions when using stock media
- Experiment with layering to create depth and interest
Advanced Editing Techniques
Once you've mastered the basics, it's time to level up your skills with some advanced editing techniques. CapCut offers a ton of features that allow you to take your videos to the next level. From keyframe animations to green screen effects, the possibilities are endless.
Keyframe Animations
Keyframe animations let you create smooth transitions and movements within your video. You can animate text, images, and even entire scenes to add dynamism to your content. Here's how to use keyframes in CapCut:
- Select the element you want to animate
- Tap on the "Keyframe" icon in the toolbar
- Set start and end points for your animation
- Adjust the motion path or properties as desired
Green Screen Effects
Green screen effects allow you to replace the background of your video with any image or video you choose. This is perfect for creating immersive scenes or adding creative backdrops to your content. To use green screen in CapCut:
- Import your green screen footage into the project
- Select the "Chroma Key" tool from the effects menu
- Adjust the settings to remove the green background
- Add your desired background and fine-tune the effect
Saving Your Work
After putting in all that effort, the last thing you want is to lose your work. That's why it's crucial to save your project regularly. CapCut automatically saves your progress, but you can also manually save your project at any time. This ensures that your hard work is safe and sound.
Here's how to save your project in CapCut:
- Tap on the "Save" icon in the toolbar
- Choose whether to save as a draft or export the final video
- Select the desired resolution and format for your export
- Wait for the rendering process to complete
- Share your masterpiece with the world!
Tips and Tricks for Template Editing
Now that you've got the basics down, here are a few extra tips and tricks to help you become a CapCut pro:
- Use the "Preview" feature to see how your changes look in real-time
- Experiment with different templates to find your favorite styles
- Backup your projects regularly to avoid losing progress
- Join CapCut communities to learn from other creators and share your work
Common Shortcuts in CapCut
CapCut also has a bunch of handy shortcuts that can speed up your editing process:
- Swipe left or right on the timeline to navigate quickly
- Double-tap to zoom in or out of the timeline
- Long-press to select multiple elements at once
- Use the "Undo" button to revert any accidental changes
Common Mistakes to Avoid
Even the best editors make mistakes from time to time. Here are a few common pitfalls to watch out for when editing templates in CapCut:
- Overloading your video with too many effects or animations
- Ignoring copyright issues when using stock media
- Not saving your work regularly
- Skipping the preview step before exporting
How to Avoid These Mistakes
To avoid these common mistakes, follow these simple guidelines:
- Keep your design simple and focused
- Always check the licensing of any media you use
- Save your project at every major milestone
- Take the time to preview your video before finalizing it
Conclusion: Mastering CapCut Templates
Editing templates in CapCut may seem intimidating at first, but with a little practice, you'll be creating stunning videos in no time. By following the tips and tricks outlined in this article, you'll be well on your way to becoming a CapCut pro. Remember, the key to success is experimenting, learning from your mistakes, and most importantly, having fun!
So, what are you waiting for? Fire up CapCut, pick a template, and let your creativity run wild. And don't forget to share your awesome creations with the world. Who knows – your next video might just go viral!
And hey, if you
4A Hair Short: The Ultimate Guide To Styling, Maintenance, And Care
Cookie Crumbles SNL: The Ultimate Guide To The Comedy Gold
How To Say My Love In Creole: A Heartfelt Journey Through Language And Culture

Get Unlimited CapCut Templates Downloads Free Trendy Templates
How To Find And Use CapCut Templates Plann

How To Edit Templates On Capcut
