How To Fix Tub Faucet Handle Like A Pro: A Step-by-Step Guide
Ever found yourself staring at that pesky tub faucet handle that just won’t cooperate? Don’t sweat it, my friend! Fixing a tub faucet handle is easier than you think. Whether it’s stuck, leaking, or just plain annoying, this guide’s got you covered. Let’s dive in and fix that faucet handle once and for all!
Picture this: you’re about to enjoy a relaxing bath, but then you realize the faucet handle is either loose, leaking, or completely stuck. Frustrating, right? Before you call a plumber and spend a fortune, let me tell you something—you can totally fix this yourself. In fact, it’s one of those DIY projects that’ll make you feel like a superhero.
Whether you’re dealing with an old faucet or a newer model, the steps are pretty much the same. And guess what? You don’t need any fancy tools or years of plumbing experience. Just a little patience and this guide, and you’ll have that handle fixed in no time. So, let’s get started!
Read also:Dans Special Note Ddlc The Hidden Depths Of A Beloved Character
Table of Contents
Tools You’ll Need to Fix Tub Faucet Handle
Common Issues with Tub Faucet Handles
Steps to Remove the Faucet Handle
Read also:Alberto Reyes Blue Beetle The Rise Of A Hero
Cost Breakdown for Fixing a Faucet Handle
Conclusion: Fix That Handle Like a Boss
Tools You’ll Need to Fix Tub Faucet Handle
Before we jump into the nitty-gritty, let’s talk about the tools you’ll need. You don’t need a toolbox full of gadgets, but having these essentials will make the job a breeze.
- Phillips or Flathead Screwdriver (depends on your faucet model)
- Allen Wrench (if your handle has a set screw)
- Pliers (for gripping or loosening stubborn parts)
- Penetrating Oil (like WD-40) for stuck handles
- Replacement Parts (if necessary)
Some faucets might require specific tools, so it’s always a good idea to check your faucet’s manual if you still have it. If not, don’t worry—most handles are pretty standard.
Why These Tools Matter
Each tool serves a purpose. For example, the screwdriver or Allen wrench helps you remove the handle, while pliers can grip any loose or corroded parts. Penetrating oil is your best friend when dealing with a stuck handle—it loosens up rust and grime that might be holding things together.
Common Issues with Tub Faucet Handles
Let’s face it—faucet handles can be a pain. But knowing the common issues can help you diagnose the problem faster. Here are a few things you might encounter:
- Stuck Handle: The handle won’t move, no matter how hard you try.
- Loose Handle: The handle wiggles or feels unstable when you turn it.
- Leaking Handle: Water drips from around the handle when you use it.
- Broken Handle: The handle is cracked, chipped, or completely detached.
Each issue requires a slightly different approach, but the good news is that most can be fixed without professional help.
How to Diagnose the Problem
Before you start tinkering, it’s important to figure out what’s actually wrong. Here’s a quick checklist to help you diagnose the issue:
- Check for visible damage: Look for cracks, corrosion, or loose screws.
- Test the handle: Turn it gently to see if it moves smoothly. If it doesn’t, it might be stuck.
- Inspect the O-ring or washer: These tiny parts can cause leaks or make the handle feel loose.
- Listen for unusual noises: If you hear a grinding or squeaking sound, there might be internal damage.
Once you’ve identified the problem, you can move on to fixing it. Remember, patience is key here. Rushing might make things worse.
Pro Tip: Take Photos
Before you start disassembling anything, take a few photos of the faucet and handle. This will help you remember how everything fits together when it’s time to reassemble.
Steps to Remove the Faucet Handle
Now that you know what’s wrong, it’s time to remove the handle. Here’s a step-by-step guide to help you do it safely and effectively:
- Turn off the water supply: This is crucial to prevent water from gushing out while you work.
- Locate the set screw: Most handles have a small set screw that holds them in place. It’s usually hidden under a decorative cap.
- Remove the cap: Use a flathead screwdriver to gently pry off the cap. Be careful not to scratch the finish.
- Unscrew the set screw: Use an Allen wrench to loosen and remove the set screw. If it’s stuck, apply some penetrating oil and let it sit for a few minutes.
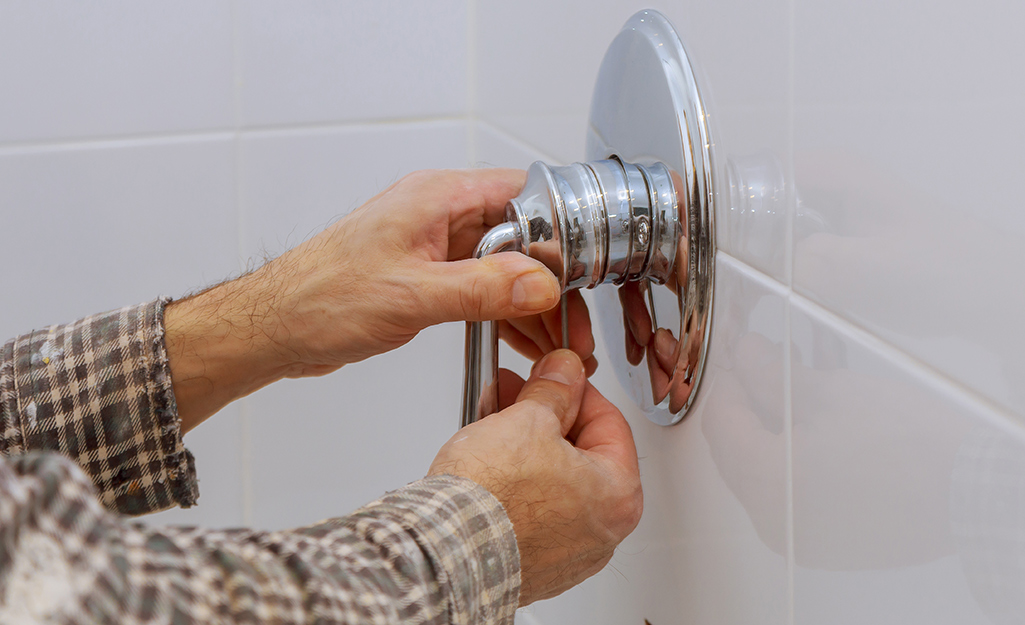
- Pull off the handle: Once the screw is out, the handle should come off easily. If it doesn’t, apply more oil or use pliers to grip it gently.
And just like that, you’ve successfully removed the handle. Now it’s time to inspect the parts underneath.
What to Look for After Removing the Handle
Once the handle is off, check for:
- Corroded or worn-out O-rings
- Loose or damaged screws
- Cracked or broken internal parts
If you find any issues, replace the damaged parts before reassembling the faucet.
Repairing the Faucet Handle
Now that you’ve identified the problem, it’s time to fix it. Here’s how to repair some common issues:
Fixing a Stuck Handle
If the handle is stuck, the problem is usually corrosion or mineral buildup. Here’s how to fix it:
- Apply penetrating oil to the set screw and let it sit for 15-20 minutes.
- Use an Allen wrench to gently loosen the screw. If it still won’t budge, tap it lightly with a hammer.
- Once the screw is out, clean the area with a wire brush to remove any rust or grime.
Fixing a Loose Handle
A loose handle is often caused by a worn-out O-ring or washer. Here’s what to do:
- Remove the handle and inspect the O-ring or washer.
- If they’re worn out or damaged, replace them with new ones. Make sure they match the size and material of the original parts.
- Reassemble the faucet and test the handle to ensure it’s secure.
When to Replace the Handle
Sometimes, repair isn’t enough. If the handle is cracked, chipped, or beyond repair, it’s time to replace it. Here’s how to choose the right replacement:
- Match the finish: Make sure the new handle matches the existing faucet’s finish (chrome, brushed nickel, etc.).
- Check the size: Measure the old handle to ensure the new one fits properly.
- Buy from a reputable source: Stick to brands you trust to ensure quality and compatibility.
Replacing the handle is as simple as removing the old one and installing the new one. Just follow the steps in reverse and test it thoroughly.
Preventive Maintenance Tips
Fixing a faucet handle might seem easy now, but wouldn’t it be great if you didn’t have to do it at all? Here are some tips to keep your faucet in top shape:
- Regularly clean the handle and faucet to prevent mineral buildup.
- Check for loose screws and tighten them as needed.
- Inspect the O-rings and washers every few months and replace them if they show signs of wear.
- Use a water softener if you live in an area with hard water to reduce mineral deposits.
A little maintenance goes a long way in extending the life of your faucet.
Cost Breakdown for Fixing a Faucet Handle
Fixing a faucet handle doesn’t have to break the bank. Here’s a rough cost breakdown:
- Tools: Most people already have the necessary tools at home.
- Parts: Replacement O-rings and washers usually cost around $5-$10. A new handle might cost $20-$50, depending on the brand and finish.
- Professional Help: If you decide to call a plumber, expect to pay around $100-$200 for a simple repair.
As you can see, DIY is not only rewarding but also cost-effective.
Frequently Asked Questions
Here are some common questions people have about fixing tub faucet handles:
Q: Can I fix a leaking faucet handle myself?
A: Absolutely! Most leaks are caused by worn-out O-rings or washers, which are easy to replace.
Q: What if the handle is too hard to remove?
A: Try applying penetrating oil and letting it sit for a while. If that doesn’t work, gently tap the handle with a hammer to loosen it.
Q: How long should a faucet handle last?
A: With proper maintenance, a faucet handle can last 10-15 years. However, factors like water quality and usage can affect its lifespan.
Conclusion: Fix That Handle Like a Boss
Fixing a tub faucet handle might seem intimidating at first, but with the right tools and a bit of patience, you can tackle this project like a pro. Whether it’s a stuck handle, a leak, or a simple replacement, this guide has got you covered. Remember to turn off the water supply, take your time, and don’t be afraid to ask for help if you need it.
Now that you’ve learned how to fix a faucet handle, why not share this article with your friends? Who knows, you might inspire someone else to take on their own DIY project. And if you have any questions or tips of your own, leave a comment below—I’d love to hear from you!
Damian Wayne's Pets: The Caped Crusader's Sidekick And His Furry Friends
Mastering The Art Of How To Tie A Baggy Shirt: Your Ultimate Guide
Beef With Juices Can: The Ultimate Flavor Bomb You Need In Your Life

How To Fix Moen Bathroom Faucet Handle Bathroom Guide by Jetstwit
How To Fix A Bathroom Faucet Handle Everything Bathroom

How To Replace Tub Faucet Handle
