How To Calibrate A Cobra 29 LTD: The Ultimate Guide For CB Radio Enthusiasts
Ever found yourself scratching your head wondering how to calibrate a Cobra 29 LTD? Well, you’re not alone! This iconic CB radio has been a go-to for truckers, hobbyists, and road warriors for decades. But like any good tool, it needs a little TLC to perform at its best. Today, we’re diving deep into the world of calibration, breaking down every step so you can get your Cobra 29 LTD running like a champ.
Calibrating a Cobra 29 LTD might sound intimidating, but trust me, it’s easier than parallel parking a semi. Whether you’re a seasoned pro or just starting out, this guide will walk you through the process step by step. We’ll cover everything from understanding the basics to fine-tuning your settings for optimal performance.
So grab a cup of coffee, pull up a chair, and let’s get down to business. By the end of this article, you’ll be a calibration wizard, ready to take on the open road with confidence. Let’s do this!
Read also:Jolly Rancher On Window The Sweet And Sticky Guide You Never Knew You Needed
Table of Contents
- Why Calibrate Your Cobra 29 LTD?
- Basic Information About the Cobra 29 LTD
- Tools You’ll Need
- Step-by-Step Calibration Guide
- Common Issues and How to Fix Them
- Tips and Tricks for Better Performance
- Frequently Asked Questions
- Advanced Settings for Enthusiasts
- Maintenance Tips to Keep Your Radio in Shape
- Conclusion: Ready to Hit the Road?
Why Calibrate Your Cobra 29 LTD?
Calibrating your Cobra 29 LTD is more than just a fancy term—it’s essential for getting the most out of your CB radio. Think of it like tuning up your car. Without regular maintenance, your engine might sputter, and the same goes for your radio. Calibration ensures that your frequency alignment is spot-on, reducing interference and boosting clarity.
But why does this matter? Well, if you’re cruising down the highway and need to communicate with fellow travelers, a poorly calibrated radio could mean garbled messages or weak signals. And let’s face it, nobody wants to be that guy who can’t hear the convoy updates. By calibrating your Cobra 29 LTD, you’re investing in smoother communication and a better overall experience.
What Happens When You Don’t Calibrate?
Skip the calibration, and you might run into some serious issues. For starters, your radio could drift off frequency, making it harder to connect with others. You might also experience excessive noise or static, which can make even the simplest conversations frustrating. In the worst-case scenario, an uncalibrated radio could damage other components over time. So yeah, calibration isn’t just a nice-to-have—it’s a must-have.
Basic Information About the Cobra 29 LTD
Before we dive into the nitty-gritty of calibration, let’s take a moment to appreciate what makes the Cobra 29 LTD so special. Introduced in the late 1970s, this CB radio quickly became a staple among long-haul truckers and hobbyists alike. Its rugged build, reliable performance, and user-friendly design have kept it relevant for over four decades.
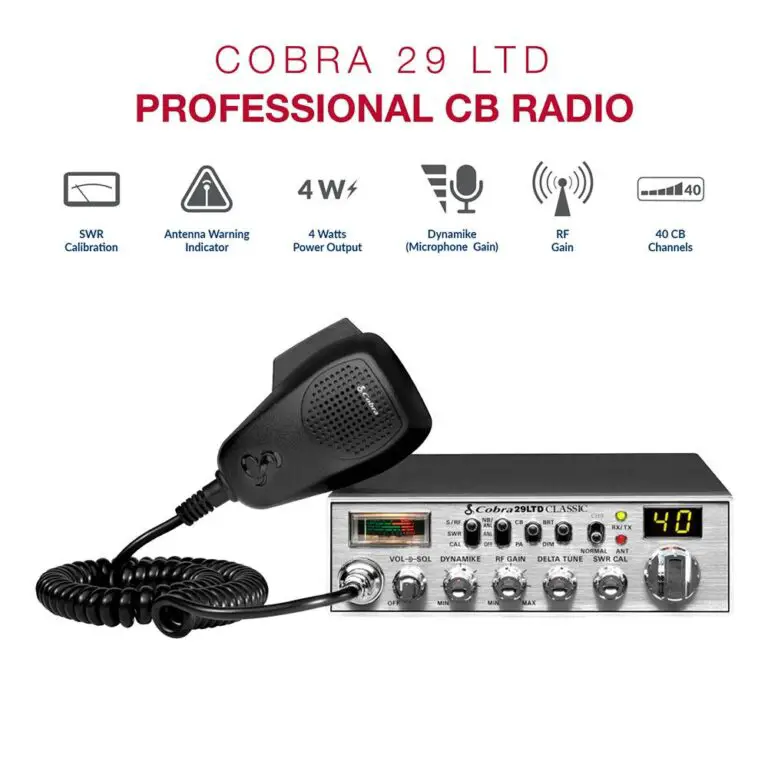
Here’s a quick rundown of its key features:
- 40 Channels for maximum communication flexibility
- SWR Meter to monitor antenna performance
- RF Gain Control for adjusting signal strength
- Squelch Control to reduce unwanted noise
- Backlit Display for easy visibility in low light
Now that you know what you’re working with, let’s talk about what you’ll need to get started.
Read also:How To Say Ldquocomo Decir Esto En Inglesrdquo In English A Beginnerrsquos Guide To Mastering Conversational English
Tools You’ll Need
Calibrating a Cobra 29 LTD doesn’t require a ton of fancy equipment, but there are a few essentials you’ll want to have on hand. Here’s the list:
- A reliable SWR Meter (included in most Cobra 29 LTD models)
- A coaxial cable tester (optional but helpful)
- A small screwdriver set for adjustments
- A stable antenna mount
- A clear, open area for testing
Having these tools ready will save you time and hassle. Plus, they’ll help ensure that your calibration process goes smoothly. Now that we’ve got our toolkit sorted, let’s move on to the fun part!
Step-by-Step Calibration Guide
Ready to get your hands dirty? Great! Here’s a detailed step-by-step guide to calibrating your Cobra 29 LTD:
Step 1: Set Up Your Antenna
The first step in calibration is setting up your antenna. Make sure it’s securely mounted and properly grounded. If you’re using a mobile setup, ensure that the antenna is positioned away from metal surfaces to avoid interference.
Step 2: Connect the SWR Meter
Next, connect the SWR meter to your radio. This will allow you to measure the Standing Wave Ratio (SWR), which is crucial for determining how well your antenna is performing. A lower SWR means better signal quality.
Step 3: Adjust the RF Gain
Use the RF Gain control to adjust the incoming signal strength. Start with the gain set to minimum, then gradually increase it until you achieve a clear, stable signal. Be careful not to overload the radio with too much gain, as this can cause distortion.
Step 4: Fine-Tune the Squelch
The squelch control helps reduce background noise. Set it to the lowest level where the noise disappears, then adjust as needed for optimal clarity. This step is all about finding the sweet spot between silence and signal.
Step 5: Test and Adjust
Finally, test your calibration by tuning through the channels. Pay attention to any signs of interference or weak signals, and make adjustments as necessary. Repeat this process until you’re satisfied with the results.
Common Issues and How to Fix Them
Even the best-laid plans can hit a snag. Here are some common issues you might encounter during calibration, along with solutions:
- High SWR Reading: Check your antenna connections and make sure everything is secure. If the problem persists, try adjusting the antenna length.
- Weak Signal Strength: Increase the RF gain gradually until the signal improves. If this doesn’t work, consider upgrading your antenna.
- Excessive Noise: Adjust the squelch control to reduce background noise. You might also want to experiment with different antenna placements.
By addressing these issues early, you’ll save yourself a lot of headaches down the line.
Tips and Tricks for Better Performance
Looking to take your Cobra 29 LTD to the next level? Here are a few tips and tricks to help you get the most out of your radio:
- Regularly clean your antenna and connections to prevent corrosion.
- Experiment with different antenna heights to find the best reception.
- Use a noise filter to reduce interference from electrical devices.
These small adjustments can make a big difference in your overall experience.
Frequently Asked Questions
Got questions? We’ve got answers! Here are some of the most common queries about calibrating a Cobra 29 LTD:
- How often should I calibrate my radio? Aim for once every six months, or more frequently if you notice performance issues.
- Can I calibrate my radio without an SWR meter? While it’s possible, using an SWR meter ensures the most accurate results.
- What’s the best antenna for a Cobra 29 LTD? It depends on your setup, but a well-grounded fiberglass antenna is a solid choice.
Still have questions? Feel free to drop them in the comments below!
Advanced Settings for Enthusiasts
If you’re a die-hard enthusiast, you might want to explore some advanced settings to further enhance your Cobra 29 LTD’s performance. These include:
- Adjusting the PA bias for improved transmit power.
- Tweaking the IF bandwidth for better selectivity.
- Modifying the audio gain for clearer reception.
Keep in mind that these settings require a deeper understanding of radio electronics, so proceed with caution.
Maintenance Tips to Keep Your Radio in Shape
Calibration is just one piece of the puzzle when it comes to maintaining your Cobra 29 LTD. Here are a few maintenance tips to keep your radio running smoothly:
- Regularly inspect your antenna for damage or wear.
- Keep your radio clean and free of dust.
- Store your radio in a cool, dry place when not in use.
A little preventive maintenance goes a long way in extending the life of your equipment.
Conclusion: Ready to Hit the Road?
And there you have it—a comprehensive guide to calibrating your Cobra 29 LTD. By following these steps and tips, you’ll be well on your way to enjoying clear, reliable communication wherever your travels take you. Remember, calibration isn’t just a one-time task—it’s an ongoing process that keeps your radio performing at its best.
So what are you waiting for? Grab your tools, fire up your radio, and get calibrating. And don’t forget to share your experiences in the comments below. Happy trails, and stay tuned!
What Does The Feeling When Knee Surgery Is Tomorrow Mean?
How To Crush The Laundry Side Hustle: Your Ultimate Guide To Success
Cybertruck Bed Open: The Ultimate Guide To Tesla's Revolutionary Pickup

Cobra 29 LTD Professional CB Radio

Cobra 29 LTD Professional CB Radio Cobra.ca
How to Calibrate a Cobra 29 Ltd Classic Cb Radio • The Truck How
