How To Charge R410A System: A Comprehensive Guide For HVAC Enthusiasts
Ever wondered how to charge R410A system like a pro? If you're here, chances are you're either a curious homeowner or an aspiring HVAC technician. R410A has become the go-to refrigerant for modern air conditioning systems, and knowing how to handle it properly is crucial. In this guide, we'll break down everything you need to know about charging an R410A system in simple terms, so even a complete beginner can follow along. Let's dive in!
Now, let’s be honest—working with refrigerants isn’t as glamorous as it sounds. But hey, it’s an essential skill if you want to keep your home or business cool and comfortable. Charging an R410A system isn’t rocket science, but it does require some knowledge, the right tools, and a bit of patience. So buckle up because we’re about to give you all the info you need to get started.
By the end of this article, you’ll not only understand the basics of how to charge R410A but also learn some pro tips to make the process smoother. Whether you’re troubleshooting an existing system or installing a new one, this guide will be your trusty companion. Let’s get to it!
Read also:How To Naturally Curl Your Hair The Ultimate Guide For Stunning Curls
What is R410A and Why Should You Care?
R410A is more than just a number—it’s a game-changer in the world of HVAC. This refrigerant is a blend of two chemicals, difluoromethane (R32) and pentafluoroethane (R125), and it’s been designed to be environmentally friendly compared to its predecessors. Unlike older refrigerants like R22, R410A doesn’t harm the ozone layer, which is why it’s become the industry standard. But why should you care? Well, if you own a modern air conditioning system, chances are it runs on R410A, and knowing how to charge it can save you a ton of money and hassle.
Here’s a quick rundown of why R410A is so popular:
- Highly efficient in heat transfer.
- Environmentally friendly (zero ozone depletion potential).
- Works well with modern HVAC systems.
But remember, R410A operates at higher pressures than older refrigerants, so safety is key. Always wear protective gear and follow manufacturer guidelines when handling it.
Tools You’ll Need to Charge an R410A System
Before you dive into the charging process, it’s important to have the right tools on hand. You don’t want to be halfway through the job and realize you’re missing something crucial. Here’s a list of must-haves:
Essential Tools
- Refrigerant gauge manifold set.
- R410A refrigerant cylinder.
- Vacuum pump (for evacuation).
- Pressure gauge.
- Temperature probes.
- Safety goggles and gloves.
Having these tools will ensure you’re prepared for the task ahead. Don’t skimp on quality here—cheap tools can lead to costly mistakes. And hey, if you’re new to this, consider investing in a beginner-friendly toolkit that includes all the essentials.
Step-by-Step Guide: How to Charge R410A System
Now that you’ve got your tools ready, let’s walk through the steps to charge an R410A system. We’ll break it down into manageable chunks so you can follow along easily.
Read also:Mike Napoli Alex The Untold Story Of A Baseball Legend
Step 1: Safety First
Before you do anything, put on your safety gear. R410A is under high pressure, and accidents can happen if you’re not careful. Make sure the area is well-ventilated, and keep flammable materials away from the work zone.
Step 2: Check for Leaks
Leaks are a common culprit when it comes to low refrigerant levels. Before you start charging, inspect the system for any signs of leakage. Use a leak detector or soapy water to identify problem areas. Fix any leaks before proceeding.
Step 3: Evacuate the System
Once you’ve ensured the system is leak-free, it’s time to evacuate it. Connect your vacuum pump to the system and let it run for at least 30 minutes. This removes any air or moisture that might be present, ensuring optimal performance.
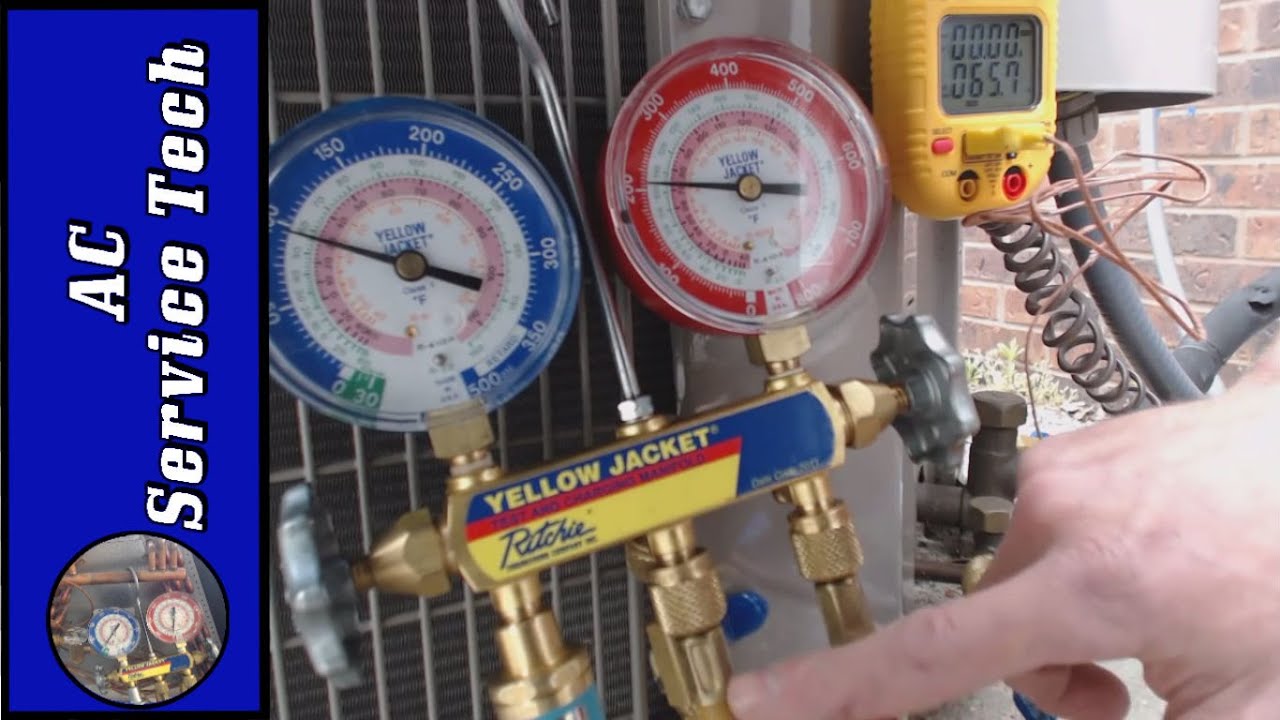
Step 4: Attach the Manifold Gauge
With the system evacuated, attach the manifold gauge to the high and low-side service ports. Make sure the connections are tight to prevent leaks during the charging process.
Step 5: Begin Charging
Now comes the exciting part—charging the system. Slowly open the valve on the refrigerant cylinder and allow R410A to flow into the system. Keep an eye on the pressure gauge and temperature readings to ensure you’re adding the right amount.
Step 6: Test the System
After charging, it’s time to test the system. Run the air conditioner and monitor the pressure and temperature levels. If everything checks out, congratulations—you’ve successfully charged your R410A system!
Common Mistakes to Avoid
Even the best of us make mistakes, but when it comes to charging an R410A system, some errors can be costly. Here are a few common mistakes to watch out for:
- Not evacuating the system properly.
- Overcharging or undercharging the refrigerant.
- Ignoring leaks before charging.
- Using the wrong tools or equipment.
By being aware of these pitfalls, you can avoid them and ensure a smooth charging process.
Troubleshooting Tips
Things don’t always go as planned, and that’s okay. Here are some troubleshooting tips to help you tackle common issues:
Issue 1: System Not Cooling Properly
If your system isn’t cooling as it should, check the refrigerant levels and ensure there are no leaks. Also, verify that the evaporator and condenser coils are clean and free of debris.
Issue 2: High Pressure Readings
High pressure readings can indicate overcharging or a blocked condenser coil. Adjust the refrigerant levels accordingly and clean the coils if necessary.
Issue 3: Low Pressure Readings
Low pressure readings might mean you have a leak or the system is undercharged. Perform a thorough leak check and add more refrigerant if needed.
Understanding R410A Pressure and Temperature Charts
R410A operates at higher pressures than older refrigerants, so understanding the pressure-temperature relationship is crucial. Here’s a quick overview:
At 70°F (21°C), the pressure for R410A is approximately 250 psi. As the temperature increases, so does the pressure. Always refer to the manufacturer’s charts to ensure accurate readings.
Environmental Considerations
While R410A is better for the ozone layer, it still has a global warming potential (GWP). This means it contributes to climate change if released into the atmosphere. Always follow proper disposal procedures and never vent R410A into the air.
Final Thoughts and Call to Action
Charging an R410A system might seem intimidating at first, but with the right knowledge and tools, it’s a skill anyone can master. From understanding the basics of R410A to troubleshooting common issues, this guide has equipped you with everything you need to tackle the job with confidence.
Now it’s your turn! If you’ve found this article helpful, don’t forget to share it with your friends and family. And if you have any questions or tips of your own, leave a comment below—we’d love to hear from you. Happy HVAC-ing!
References
For further reading and to deepen your understanding, check out these trusted sources:
- ASHRAE Handbook—Refrigeration.
- EPA Guidelines for Refrigerant Management.
- Manufacturer Manuals for HVAC Systems.
Table of Contents
- What is R410A and Why Should You Care?
- Tools You’ll Need to Charge an R410A System
- Step-by-Step Guide: How to Charge R410A System
- Common Mistakes to Avoid
- Troubleshooting Tips
- Understanding R410A Pressure and Temperature Charts
- Environmental Considerations
- Final Thoughts and Call to Action
- References
A Chorus Line Sheila: The Iconic Character Who Stole The Spotlight
How To Master The Art Of 4x4 Truck Drawings: A Beginner's Guide
How To Tie Tie Neck Blouse: The Ultimate Guide For Stylish Looks
How To Charge A R410a System

How To Charge A R410a System

Charge Refrigerant In Mini Split AC R410a Freon Air, 60 OFF
