How To Chisel For Door Hinges: A Comprehensive Guide For Every DIY Enthusiast
Ever wondered how to chisel for door hinges like a pro? Well, you're in the right place, mate. Whether you're installing a new door or fixing an old one, knowing how to chisel for door hinges is a skill that can save you both time and money. This guide will take you through every step, from the basics to the nitty-gritty details, ensuring your door fits perfectly and operates smoothly. So grab your tools, and let's get started!
Now, let’s face it—chiseling might seem intimidating at first, but trust me, it’s not rocket science. The key lies in precision, patience, and using the right technique. If you've ever struggled with doors that don’t close properly or hinges that just don’t sit right, this article is tailor-made for you. We'll cover everything you need to know, including the best tools to use, common mistakes to avoid, and pro tips that’ll make your job easier.
By the end of this guide, you'll be equipped with the knowledge to tackle any door hinge chiseling project like a seasoned professional. So, buckle up and get ready to level up your DIY skills. Let’s dive in!
Read also:What Is Added By Mention On Snapchat A Deep Dive Into The Hype
Table of Contents
- Tools You'll Need for the Job
- Understanding the Basics of Door Hinges
- Step-by-Step Guide on How to Chisel for Door Hinges
- Pro Tips for Perfect Chiseling
- Common Mistakes to Avoid
- Safety First: Essential Safety Tips
- Different Types of Chisels for Door Hinges
- Choosing the Right Material for Your Door
- Maintaining Your Chisels for Long-Lasting Use
- Frequently Asked Questions About Chiseling for Door Hinges
Tools You'll Need for the Job
Before you start chiseling for door hinges, it’s crucial to gather all the necessary tools. The right tools make all the difference between a smooth process and a frustrating one. Here's a list of what you'll need:
Essential Tools List
- A good-quality chisel set—make sure it includes both flat and gouge chisels.
- A mallet or hammer for striking the chisel.
- A utility knife or marking gauge to mark where you need to chisel.
- A measuring tape for precise measurements.
- A square or level to ensure everything lines up correctly.
- Sandpaper or a sanding block for smoothing rough edges.
Having these tools on hand ensures you’re prepared for any challenge that comes your way. Plus, investing in quality tools will make the job easier and more enjoyable. Who doesn’t love working with tools that feel like an extension of their hands?
Understanding the Basics of Door Hinges
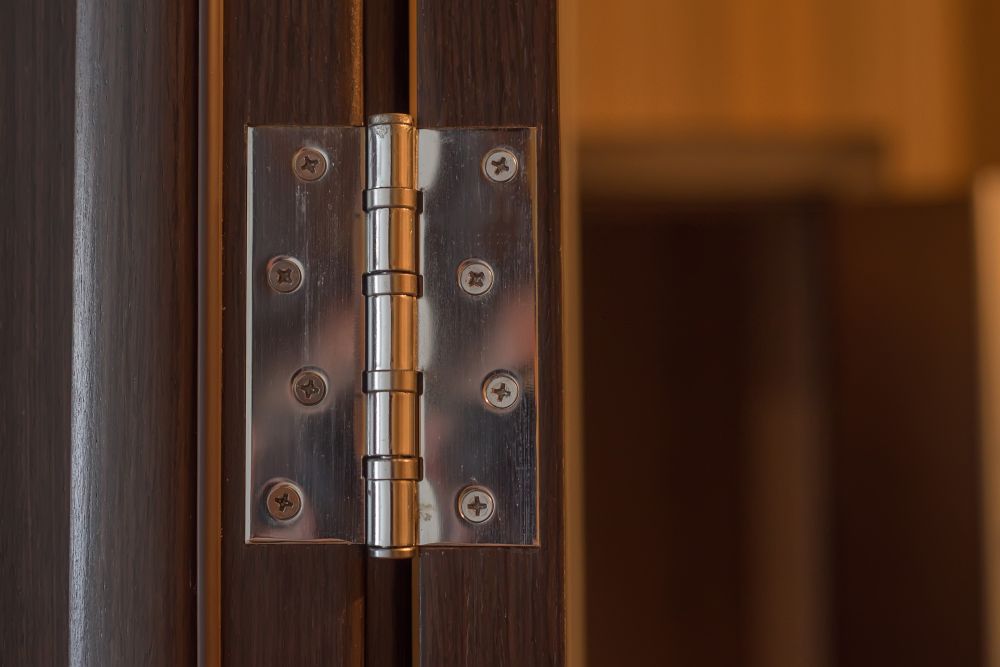
Door hinges might seem simple, but they play a critical role in how a door functions. Essentially, hinges allow the door to swing open and closed smoothly. When installing or repairing hinges, proper chiseling is essential to ensure the hinge sits flush with the door or frame. Without proper chiseling, the door may stick, sag, or even fail to close properly.
Here’s a quick rundown of what you should know about door hinges:
- Butt Hinges: The most common type of hinge used for interior and exterior doors.
- Pivot Hinges: Often used for heavier doors, providing a more stable and durable option.
- Concealed Hinges: Commonly used in cabinets and furniture, designed to be hidden from view.
Understanding the type of hinge you’re working with will help you determine the best approach for chiseling. Remember, each type may require slightly different techniques, so always check the manufacturer’s instructions if you’re unsure.
Step-by-Step Guide on How to Chisel for Door Hinges
Now that you’ve got your tools and a basic understanding of door hinges, let’s dive into the step-by-step process of chiseling for door hinges. Follow these instructions carefully, and you’ll be chiseling like a pro in no time.
Read also:Unveiling The Wolf Of Wall Street Leonardo Dicaprio And Matthew Mcconaugheys Iconic Scene
Step 1: Measure and Mark
Start by measuring the hinge and marking its position on the door or frame. Use a utility knife or marking gauge to score the outline of the hinge. This will ensure clean, precise cuts when you begin chiseling.
Step 2: Begin Chiseling
Using your chisel, carefully remove small amounts of wood at a time. Start with a light touch, gradually deepening the cut as needed. Always chisel away from yourself for safety and control.
Step 3: Test the Fit
After each chisel stroke, test the hinge to see if it fits snugly into the mortise. It’s better to take your time and make small adjustments rather than risk removing too much wood and ruining the fit.
Step 4: Smooth the Edges
Once the hinge fits properly, use sandpaper to smooth out any rough edges. This step is crucial for ensuring the hinge operates smoothly and doesn’t catch on anything.
By following these steps, you’ll achieve a perfect fit every time. Remember, patience is key—rushing the process can lead to mistakes that’ll cost you more time in the long run.
Pro Tips for Perfect Chiseling
Here are a few pro tips to help you achieve professional results when chiseling for door hinges:
- Sharpen Your Chisels: A sharp chisel makes the job easier and produces cleaner cuts.
- Use a Clamping Block: Clamp a small block of wood to the edge of the door or frame to prevent slipping and ensure straight cuts.
- Go Slow and Steady: Removing small amounts of wood at a time gives you more control and reduces the risk of mistakes.
- Practice on Scrap Wood: If you’re new to chiseling, practice on a piece of scrap wood before working on the actual door or frame.
These tips will help you avoid common pitfalls and achieve professional-quality results. Remember, even the pros started somewhere, so don’t be afraid to experiment and learn as you go.
Common Mistakes to Avoid
Even the most experienced DIY enthusiasts make mistakes from time to time. Here are some common errors to watch out for when chiseling for door hinges:
- Removing Too Much Wood: This can cause the hinge to sit too deep, leading to a wobbly or misaligned door.
- Not Measuring Carefully: Accurate measurements are crucial for a proper fit. Double-check your measurements before you start chiseling.
- Using Dull Tools: Dull chisels can cause uneven cuts and make the job much harder than it needs to be.
Avoiding these mistakes will save you time and frustration, ensuring your door hinge installation goes smoothly. Remember, preparation is key, so take the time to measure and plan carefully before you start chiseling.
Safety First: Essential Safety Tips
Safety should always be your top priority when working with tools. Here are some essential safety tips to keep in mind:
- Wear Safety Gear: Protect your eyes with safety goggles and your hands with gloves.
- Work in a Well-Lit Area: Good lighting helps you see what you’re doing and avoid mistakes.
- Keep Tools Clean and Sharp: Regularly clean and sharpen your tools to ensure they function properly and safely.
Following these safety tips will help you stay safe and avoid accidents while working on your door hinge project. Remember, it’s always better to be safe than sorry!
Different Types of Chisels for Door Hinges
Not all chisels are created equal, and choosing the right one for the job can make a big difference. Here’s a quick overview of the different types of chisels commonly used for door hinges:
- Flat Chisels: Ideal for creating flat, even cuts.
- Gouge Chisels: Perfect for carving out curved or rounded areas.
- Mortise Chisels: Specifically designed for creating mortises, making them ideal for hinge work.
Choosing the right chisel for the job will ensure you achieve the best results possible. Don’t be afraid to experiment with different types to see which works best for your specific project.
Choosing the Right Material for Your Door
The type of material your door is made from can affect how you approach chiseling for door hinges. Here’s a quick guide to help you choose the right technique for different door materials:
- Wood Doors: The most common type, wood doors require careful chiseling to avoid splitting or damaging the wood.
- MDF Doors: Easier to work with than solid wood, MDF doors require less force when chiseling.
- Metal Doors: More challenging to work with, metal doors often require specialized tools and techniques.
Understanding the material you’re working with will help you adjust your technique and achieve the best results. Always research the specific requirements for your door type before starting your project.
Maintaining Your Chisels for Long-Lasting Use
Proper maintenance of your chisels will ensure they last for years to come. Here are some tips for keeping your chisels in top condition:
- Sharpen Regularly: A sharp chisel is easier to use and produces better results.
- Clean After Use: Wipe down your chisels after each use to remove any dirt or debris.
- Store Properly: Keep your chisels in a safe, dry place to prevent rust and damage.
By following these maintenance tips, you’ll ensure your chisels remain in excellent condition, ready for your next project whenever you need them.
Frequently Asked Questions About Chiseling for Door Hinges
Here are some common questions people have about chiseling for door hinges:
Q: Can I use a power tool instead of a chisel?
A: While power tools can speed up the process, they may not provide the same level of precision as a hand chisel. It’s often best to use a combination of both for optimal results.
Q: What should I do if I remove too much wood?
A: If you remove too much wood, you can try filling the gap with wood filler or shims to bring the hinge back to the correct depth.
Q: How often should I sharpen my chisels?
A: It’s a good idea to sharpen your chisels after every few uses to ensure they remain effective and safe to use.
These FAQs should help answer some of the most common questions about chiseling for door hinges. If you have any other questions, feel free to leave a comment below!
Conclusion
Chiseling for door hinges might seem daunting at first, but with the right tools, techniques, and a bit of patience, anyone can master this essential skill. By following the steps outlined in this guide, you’ll be able to achieve professional-quality results every time.
Remember, the key to success lies in preparation, precision, and practice. Take your time, measure carefully, and don’t be afraid to experiment. With a little practice, you’ll be chiseling like a pro in no time.
So, what are you waiting for? Grab your tools and get started on your next door hinge project. And don’t forget to share your experiences and tips in the comments below. Happy chiseling!
How To Draw Mickey Mouse Ears: The Ultimate Guide For Every Artist
Coiffure Cheveux Long Fillette: Unlocking The Magic Of Long Hair Styles For Your Little Princess
Crumbl Cookies Altoona PA: The Sweetest Day Is Coming!

Do You Have To Chisel Door Hinges Saw Summary
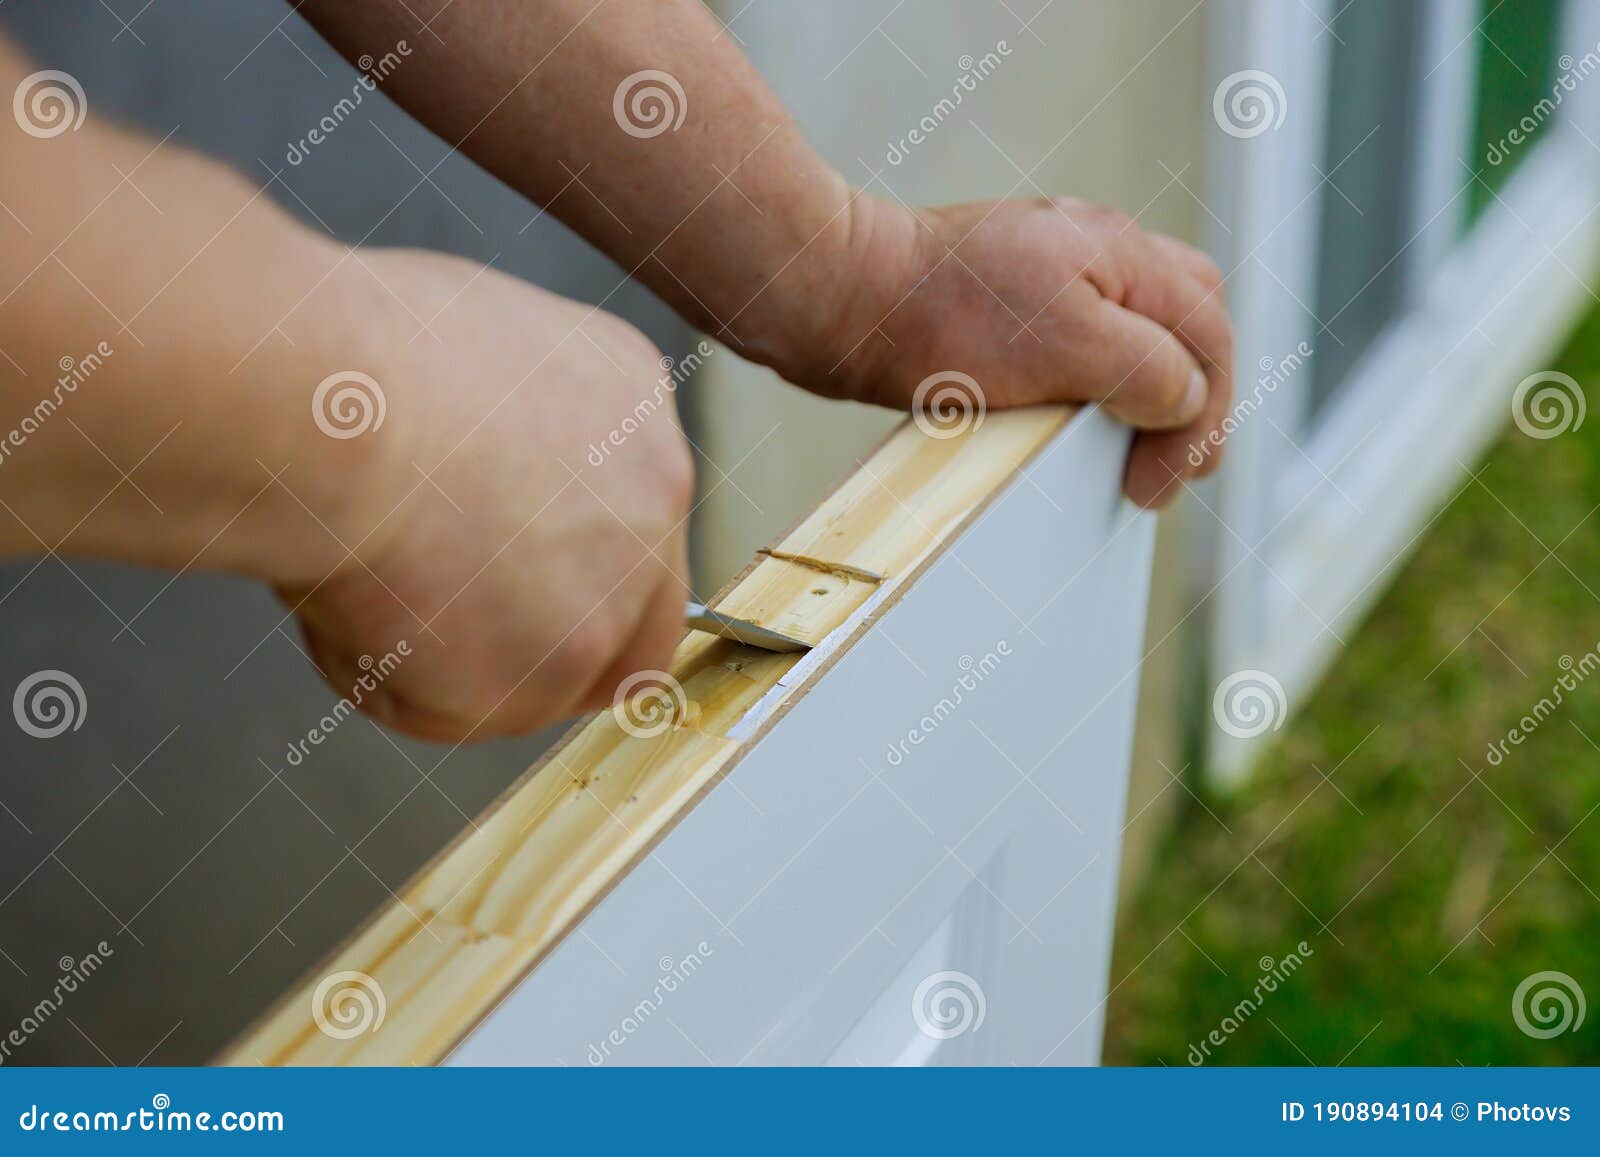
Wooden Door Installation of a Hinge Working with Chisel Prepared for
How to Install Door Hinges on Door Blanks
