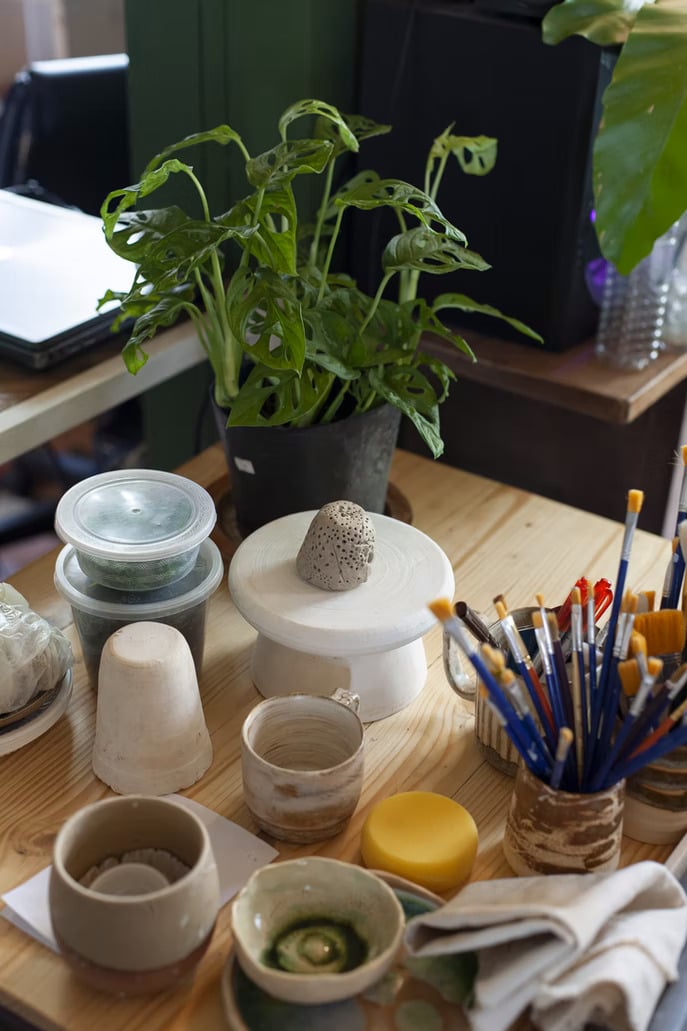
How To Dry Air Clay Faster: The Ultimate Guide For Speedy Creators
Have you ever felt like waiting for air clay to dry is like watching paint dry, but worse? Trust me, I’ve been there, and it’s not fun. If you're anything like me, you want your creations ready yesterday, not next week. So, let’s dive into how to dry air clay faster without compromising its quality or structure. Whether you're crafting jewelry, sculptures, or miniatures, this guide has got you covered.
Drying air clay can sometimes feel like an eternity, especially when deadlines are looming or your creative juices are running wild. But don’t worry, we’re here to help you speed things up. In this article, we’ll explore practical methods, expert tips, and even a few tricks of the trade that will cut down drying time significantly.
By the end of this read, you’ll be equipped with everything you need to know about drying air clay faster. So, grab your favorite beverage, get comfy, and let’s get started. Your next masterpiece is just a few tips away!
Read also:What Is A Place Holder In A Relationship Unlocking The Truth Behind This Modernday Phenomenon
Table of Contents
- Understanding Air Clay and Its Drying Process
- Environmental Factors Affecting Drying Time
- Methods to Speed Up Drying
- Tools and Equipment You Can Use
- The Role of Temperature and Humidity
- Preparation Tips for Faster Drying
- Avoiding Common Mistakes
- Troubleshooting Common Issues
- Expert Recommendations for Best Results
- Final Thoughts: Your Journey to Faster Creations
Understanding Air Clay and Its Drying Process
First things first, let’s break down what air clay actually is and why it takes so long to dry. Air clay is a type of polymer clay that hardens when exposed to air. Unlike oven-baked clays, air clay relies on evaporation to solidify, which means the drying process is heavily influenced by environmental factors. Now, this is where the fun begins – or the frustration, depending on how you look at it.
Why Does Air Clay Take So Long to Dry?
Well, the answer lies in the clay’s composition. Air clay contains a lot of moisture, and for it to harden properly, all that water needs to evaporate. This process can take anywhere from a few hours to several days, depending on the thickness of your piece and the conditions around it.
But hey, don’t lose hope just yet. There are ways to accelerate this process without ruining your work. Stick around, and I’ll show you how!
Environmental Factors Affecting Drying Time
Before we dive into speeding things up, let’s talk about the factors that can either slow down or speed up the drying process. Understanding these will help you create the perfect environment for your air clay projects.
Key Factors to Consider
- Humidity Levels: High humidity can significantly slow down drying because there’s already a lot of moisture in the air.
- Temperature: Warmer temperatures generally speed up drying, but too much heat can cause cracking.
- Air Circulation: Good airflow helps moisture evaporate faster, so make sure your workspace is well-ventilated.
Now that you know what affects drying time, let’s move on to some actionable tips.
Methods to Speed Up Drying
Alright, here’s the part you’ve been waiting for – how to dry air clay faster. Below are some proven methods that will help you get your creations ready in no time.
Read also:Wc Swearingen Recreation Area A Hidden Gem For Outdoor Enthusiasts
Using a Fan
A fan is one of the simplest and most effective tools for speeding up drying. By increasing airflow around your clay, you’re helping moisture escape faster. Just make sure the fan isn’t blowing directly onto your piece, as this can cause uneven drying or even damage delicate areas.
Dehumidifiers
If you live in a particularly humid area, investing in a dehumidifier can work wonders. These devices remove excess moisture from the air, creating a drier environment for your clay to dry faster.
Heating Elements
While heat can be your friend, it’s important to use it carefully. You can use a low-wattage heating pad or even a hairdryer on a cool setting to gently warm your clay. However, avoid using high heat, as this can cause cracks or deformations.
Tools and Equipment You Can Use
There’s no need to reinvent the wheel when it comes to drying air clay. Several tools and gadgets can make the process faster and more efficient. Here are a few you might want to consider:
Food Dehydrators
Believe it or not, a food dehydrator can be a game-changer for drying air clay. These devices are designed to remove moisture from food, making them perfect for our purposes. Plus, they offer consistent temperature control, ensuring even drying.
Portable Drying Boxes
Portable drying boxes are compact, affordable, and highly effective. They often come with adjustable temperature settings and built-in fans, providing the perfect conditions for drying air clay.
Remember, the key is to find a tool that fits your budget and project size. Whether you go for a high-tech solution or stick to basics like fans and dehumidifiers, the results can be impressive.
The Role of Temperature and Humidity
As mentioned earlier, temperature and humidity play crucial roles in the drying process. Let’s delve deeper into how you can manipulate these factors to your advantage.
Optimal Temperature Range
For most air clays, the ideal drying temperature falls between 68°F and 77°F (20°C to 25°C). Going beyond this range can lead to issues like cracking or warping. If you’re using heating elements, keep them on low settings and monitor your clay closely.
Managing Humidity Levels
Humidity is a double-edged sword. While a little moisture can help prevent cracking, too much will slow down drying. Aim for a relative humidity level of around 40-50% for the best results. You can use a hygrometer to measure humidity levels in your workspace.
By controlling these factors, you’ll create the perfect drying environment for your air clay projects.
Preparation Tips for Faster Drying
Preparation is key when it comes to speeding up the drying process. Here are a few tips to help you get started on the right foot:
- Thin Layers: Thicker pieces take longer to dry, so consider breaking down your project into smaller, thinner sections.
- Smooth Surfaces: Rough surfaces trap moisture, so smoothing out your clay can help it dry faster.
- Protective Coating: Applying a thin layer of cornstarch or talcum powder can help absorb excess moisture and speed up drying.
These small adjustments can make a big difference in how quickly your clay dries. Plus, they’ll help ensure a smooth, flawless finish.
Avoiding Common Mistakes
Even the most experienced crafters make mistakes sometimes. Here are a few pitfalls to watch out for when drying air clay:
Overheating
While heat can speed up drying, too much of it can ruin your work. Overheating can cause cracks, warping, or even melting, depending on the type of clay you’re using.
Improper Storage
Once your clay is dry, it’s important to store it properly to prevent moisture from re-entering. Use airtight containers or seal your pieces with a varnish to keep them in pristine condition.
By avoiding these common mistakes, you’ll save yourself a lot of frustration and wasted effort.
Troubleshooting Common Issues
No matter how careful you are, problems can still arise. Here’s how to tackle some of the most common issues you might encounter:
Cracking
Cracks usually occur due to uneven drying or excessive heat. To fix them, lightly dampen the affected area with water and smooth it out with your fingers. Allow it to dry again, and you should be good to go.
Soft Spots
Soft spots indicate that the clay hasn’t dried completely. Increase airflow or use a dehumidifier to address this issue. If the problem persists, consider reworking the piece or starting over.
With these troubleshooting tips, you’ll be able to handle any challenges that come your way.
Expert Recommendations for Best Results
Now that you’ve learned all the tricks of the trade, here are some final recommendations to ensure your air clay projects turn out perfectly every time:
- Experiment: Every type of air clay is different, so don’t be afraid to experiment with various drying methods to find what works best for you.
- Document Your Process: Keep a journal or log of your drying techniques and results. This will help you refine your approach over time.
- Join a Community: There are tons of online communities where crafters share tips and tricks. Engaging with others can provide valuable insights and inspiration.
By following these expert recommendations, you’ll become a pro at drying air clay faster in no time.
Final Thoughts: Your Journey to Faster Creations
And there you have it – everything you need to know about how to dry air clay faster. From understanding environmental factors to mastering drying techniques, you’re now equipped with the knowledge to tackle any project with confidence.
Remember, practice makes perfect. The more you experiment with different methods and tools, the better you’ll become at speeding up the drying process without sacrificing quality. So, go ahead and start creating – your next masterpiece is waiting!
If you found this article helpful, don’t forget to share it with your fellow crafters. And as always, feel free to leave a comment below with your thoughts or questions. Happy crafting!
One-Handed Drummers: Breaking Barriers And Redefining Rhythm
Marco D'Alessandro Siblings: The Untold Story Of Family, Fame, And Passion
Why Is Givenchy Jewelry So Cheap? Unveiling The Secrets Behind Affordable Luxury
How to Make Air Dry Clay Dry Faster? 5 Easy Ways Craftbuds

How To Make Air Dry Clay Dry Faster
Polyform Air Dry Clay • Art Supply Guide
