How To Take Off Mop Head: A Step-by-Step Guide For Cleaning Enthusiasts
Let’s face it, folks, cleaning can be a real chore, but having the right tools—and knowing how to maintain them—can make all the difference. One of the most common questions we get is, "How to take off mop head?" Whether you're swapping out an old mop head for a fresh one or just giving it a good clean, mastering this skill is essential for keeping your floors spotless. In this article, we’ll break it down step by step, so you’ll never have to stress over this again.
Now, before we dive into the nitty-gritty, let me tell you something: a mop head that doesn’t come off easily is like a stubborn roommate who won’t clean up after themselves. It’s frustrating, right? But don’t worry, we’ve got your back. By the end of this guide, you’ll be a pro at removing mop heads like a seasoned housekeeping ninja.
This isn’t just about taking off a mop head; it’s about empowering you to take control of your cleaning game. So, grab a cup of coffee, sit back, and let’s get started on how to take off that mop head like a champ!
Read also:Colby House Bunny The Ultimate Guide To This Iconic Playboy Legend
Why Knowing How to Take Off Mop Head Matters
Let’s be honest, mops are one of the unsung heroes of our cleaning arsenal. But what happens when that trusty mop head starts looking worse for wear? It’s not just about aesthetics; a worn-out mop head can harbor dirt, bacteria, and even mold, which defeats the whole purpose of cleaning. That’s why learning how to take off mop head is crucial for maintaining hygiene in your home.
Benefits of Removing and Replacing Mop Heads
Replacing your mop head regularly is like giving your cleaning routine a facelift. Here’s why it’s worth the effort:
- Improved Cleaning Efficiency: A fresh mop head picks up dirt and grime more effectively.
- Hygiene Boost: Old mop heads can become breeding grounds for germs, so swapping them out keeps your home healthier.
- Cost-Effective: Many mop heads are reusable or washable, meaning you save money by simply cleaning or replacing them.
So, whether you’re dealing with a Swiffer, a traditional string mop, or any other type, knowing how to take off mop head is a skill that pays dividends in the long run.
Step-by-Step Guide on How to Take Off Mop Head
Alright, let’s get down to business. Removing a mop head might seem intimidating, but it’s actually a breeze once you know the drill. Here’s a step-by-step guide to make it as easy as pie:
Step 1: Identify the Mop Type
Not all mops are created equal, so the first step is figuring out what kind of mop you’re dealing with. Is it a:
- Swiffer-style mop with snap-on heads?
- Traditional string mop with a screw-on mechanism?
- Microfiber mop with Velcro attachments?
Each type has its own quirks, so understanding yours is key to success.
Read also:Why Cooking Chips In Lard Is A Gamechanger For Foodies
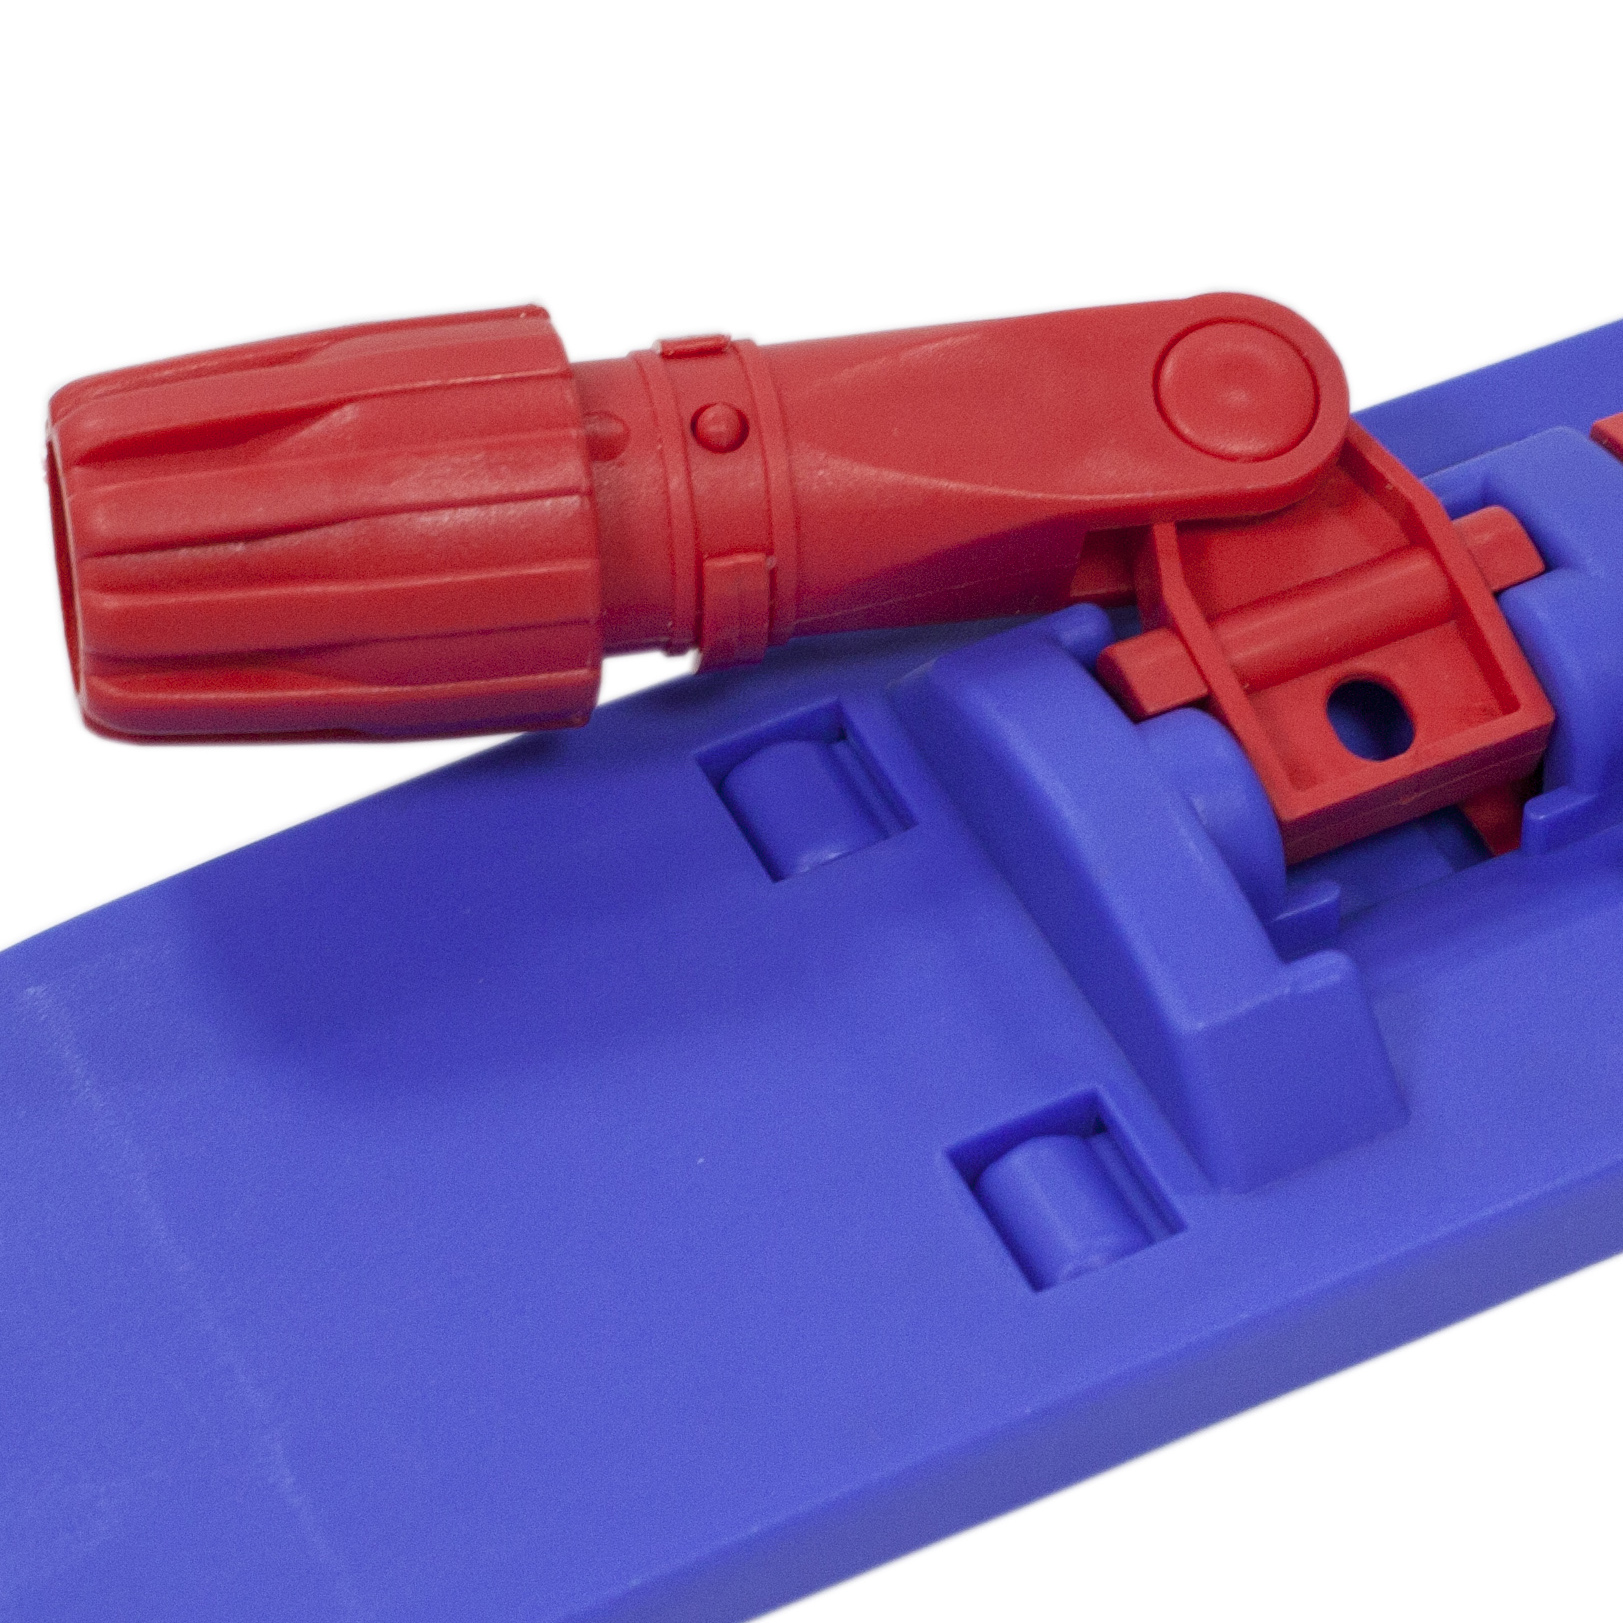
Step 2: Locate the Release Mechanism
Most modern mops come with some kind of release mechanism. For Swiffer-style mops, you’ll usually find a small tab or button to press. Traditional mops might have screws or clips holding the head in place. Take a moment to inspect your mop carefully and locate the release mechanism.
Step 3: Detach the Mop Head
Once you’ve found the release mechanism, it’s time to detach that mop head. Here’s how:
- For Swiffer-style mops, press the tab or button and gently pull the head away.
- For string mops, unscrew the cap or clip and lift the head off.
- For microfiber mops, unclip or unzip the attachment and remove the head.
Voilà! That wasn’t so hard, was it?
Common Issues and Troubleshooting
Even the best-laid plans can hit a snag. If you’re having trouble removing your mop head, don’t panic. Here are some common issues and how to fix them:
Problem: The Mop Head Won’t Budge
Sometimes, mop heads get stuck due to dirt buildup or wear and tear. Try these tips:
- Use a flathead screwdriver to gently pry the head loose.
- Soak the mop in warm water for a few minutes to loosen any debris.
- Apply a small amount of lubricant to the attachment point.
Problem: The Release Mechanism is Broken
If the release mechanism is shot, you might need to get creative. Consider:
- Using pliers to carefully detach the head.
- Consulting the manufacturer’s website for replacement parts.
Remember, patience is key. If all else fails, it might be time to upgrade to a new mop.
How Often Should You Replace Your Mop Head?
This is a question we get asked all the time. The frequency depends on how often you clean and the type of mop you use. As a general rule:
- For daily cleaning, replace the mop head every 1-2 months.
- For weekly cleaning, every 3-4 months should suffice.
- For occasional cleaning, you can stretch it to 6 months.
Remember, a dirty mop head is counterproductive, so don’t skimp on replacements.
DIY Mop Head Cleaning Tips
Not ready to toss out that old mop head just yet? Cleaning it yourself can extend its lifespan. Here’s how:
Step 1: Soak the Mop Head
Fill a bucket with warm water and add a few drops of dish soap. Submerge the mop head and let it soak for 30 minutes to loosen dirt and grime.
Step 2: Scrub and Rinse
Use an old toothbrush or sponge to scrub away any stubborn stains. Rinse thoroughly under running water until all soap residue is gone.
Step 3: Dry Completely
Hang the mop head to dry in a well-ventilated area. Ensure it’s completely dry before reattaching it to the mop handle.
With these simple steps, you can breathe new life into your old mop head.
Best Mop Heads for Your Cleaning Needs
Not all mop heads are created equal. Here’s a quick rundown of some of the best options on the market:
Swiffer Wet Jet Replacement Heads
These pre-moistened pads are perfect for quick clean-ups. They’re easy to attach and remove, making them a favorite among busy households.
Microfiber Mop Heads
For eco-conscious cleaners, microfiber mop heads are a great choice. They’re reusable, machine washable, and effective on a variety of surfaces.
String Mop Heads
Classic and reliable, string mop heads are ideal for tackling tough grime on tile and hardwood floors.
Choose the one that fits your lifestyle and cleaning preferences.
Expert Tips for Maintaining Your Mop
Now that you know how to take off mop head, here are a few expert tips to keep your mop in tip-top shape:
- Store your mop in a dry, upright position to prevent mildew.
- Regularly inspect the mop handle for signs of wear and tear.
- Consider having a backup mop head on hand for emergencies.
By following these tips, you’ll ensure your mop stays in working order for years to come.
Conclusion: Mastering the Art of Mop Head Removal
And there you have it, folks—a comprehensive guide on how to take off mop head like a pro. From identifying your mop type to troubleshooting common issues, we’ve covered everything you need to know. Remember, maintaining your cleaning tools is just as important as using them, so don’t neglect those mop heads!
Now, it’s your turn. Share your cleaning tips in the comments below, or let us know if you’ve tried any of the methods we discussed. And if you found this article helpful, don’t forget to spread the word by sharing it with your fellow cleaning enthusiasts. Happy cleaning, y’all!
Table of Contents
- Why Knowing How to Take Off Mop Head Matters
- Step-by-Step Guide on How to Take Off Mop Head
- Common Issues and Troubleshooting
- How Often Should You Replace Your Mop Head?
- DIY Mop Head Cleaning Tips
- Best Mop Heads for Your Cleaning Needs
- Expert Tips for Maintaining Your Mop
- Conclusion: Mastering the Art of Mop Head Removal
Costco Boneless Lamb Leg Recipe: A Must-Try For Meat Lovers
Come Right On Me I Mean Camaraderie Meaning: A Deep Dive Into This Bonding Spirit
How To Make Snow From A Propane Tank

How to Take a Mop Head Off HomeViable

How to Take a Mop Head Off HomeViable
Mop Head
