How To Make Cake Pops With Cake Pop Mold: A Fun And Easy Guide For Everyone!
Ever wondered how to make cake pops with cake pop mold? Well, buckle up, because we're diving into the sweet world of cake pops, and trust me, it's going to be a delightful ride. Cake pops have taken the dessert scene by storm, and with the help of a cake pop mold, creating these bite-sized treats has never been easier. Whether you're a seasoned baker or just starting out, this guide will walk you through every step of the process, so you can impress your friends and family with your newfound baking skills.
Cake pops are more than just a dessert; they're a canvas for creativity. From birthday parties to holiday gatherings, these little delights are perfect for any occasion. And the best part? You don't need to be a professional chef to make them. With the right tools and a bit of patience, anyone can master the art of cake pop making. So, let's get started and turn your kitchen into a sweet wonderland!
Now, before we dive into the nitty-gritty of how to make cake pops with cake pop mold, let's talk about why this dessert is so popular. Cake pops are not only delicious but also visually appealing. They come in various shapes, sizes, and flavors, making them a hit with people of all ages. Plus, they're super easy to customize, so you can let your imagination run wild. Are you ready to join the cake pop craze? Let's go!
Read also:Dia De Los Muertos Half Makeup A Celebration Of Life And Art
Why Use Cake Pop Mold?
Using a cake pop mold is like having a secret weapon in your baking arsenal. These molds are specifically designed to bake cake batter into perfectly shaped spheres, eliminating the need for tedious shaping by hand. Not only does this save you time and effort, but it also ensures that your cake pops turn out uniform and professional-looking every single time. So, if you're wondering how to make cake pops with cake pop mold, the answer is simple: it's all about convenience and consistency.
Another great thing about cake pop molds is that they come in various materials, such as silicone and metal, each with its own set of benefits. Silicone molds are flexible and easy to clean, while metal molds distribute heat evenly, resulting in a perfectly baked cake pop every time. Whatever your preference, there's a mold out there that's perfect for you. So, why not give it a try and see the difference it makes in your baking experience?
Benefits of Using Cake Pop Mold
- Saves time and effort
- Ensures uniform and professional-looking cake pops
- Available in various materials for different baking needs
- Easy to clean and store
What You'll Need to Get Started
Before you start baking, make sure you have all the necessary tools and ingredients on hand. Here's a quick list to help you prepare:
- Cake pop mold (silicone or metal)
- Cake mix or homemade cake batter
- Buttercream frosting
- Candy melts or chocolate for dipping
- Cake pop sticks
- A microwave or double boiler for melting chocolate
- Decorations (sprinkles, edible glitter, etc.)
Having everything ready before you start will make the process smoother and more enjoyable. Plus, it gives you time to plan out your designs and get creative with your decorations. So, gather your supplies and let's move on to the next step!
Choosing the Right Cake Pop Mold
When it comes to choosing a cake pop mold, there are a few things to consider. First, think about the material. Silicone molds are great for beginners because they're flexible and easy to use, while metal molds are ideal for more experienced bakers who want precise results. Second, consider the size. Some molds come in mini, regular, and jumbo sizes, so choose the one that best suits your needs. Lastly, look for a mold with a non-stick coating to make cleanup a breeze.
Step-by-Step Guide: How to Make Cake Pops with Cake Pop Mold
Now that you have everything you need, it's time to get baking! Follow these simple steps to create delicious cake pops that will leave everyone wanting more.
Read also:Taylor Tomlinson Hereafter The Life Career And Legacy Of A Standup Sensation
Step 1: Prepare the Cake Batter
Start by preparing your cake batter according to the package instructions or your favorite recipe. For best results, use a dense cake mix, as it holds together better when shaped into pops. Once the batter is ready, preheat your oven and lightly grease your cake pop mold.
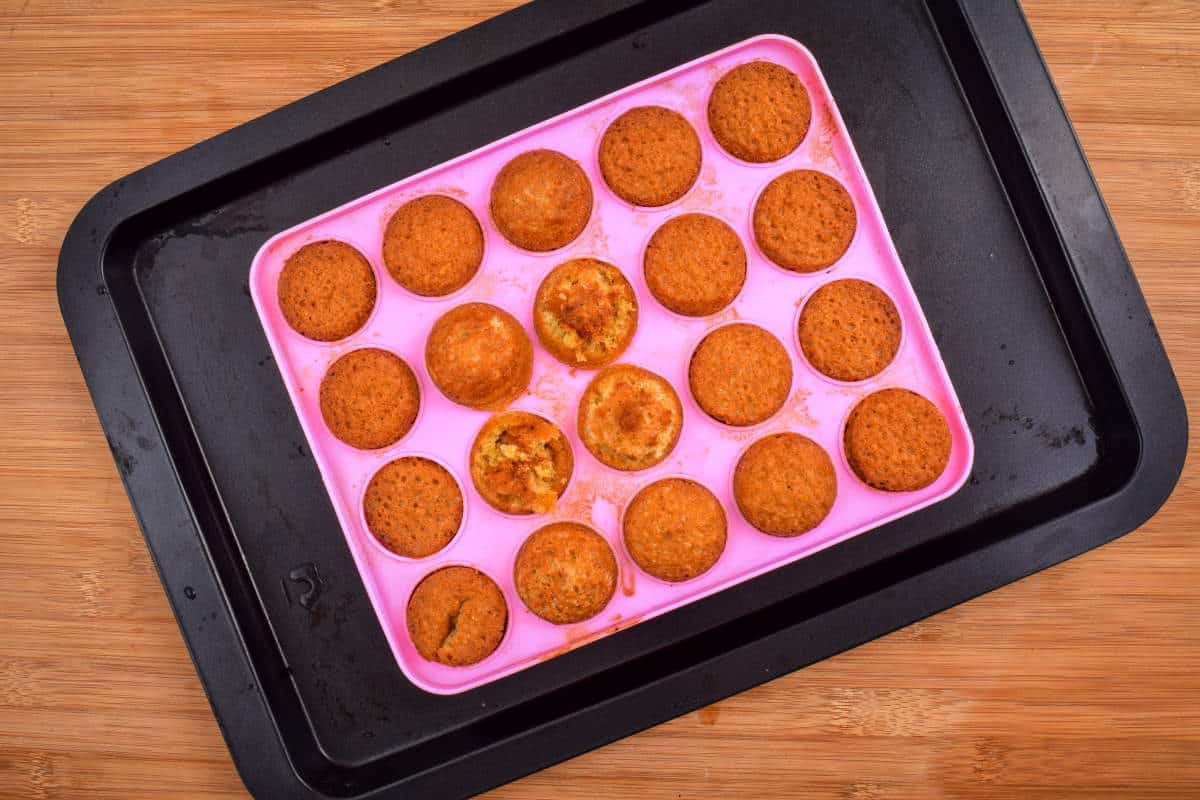
Step 2: Bake the Cake Pops
Spoon the batter into the mold, filling each cavity about halfway. This ensures that the pops bake evenly without overflowing. Place the mold in the oven and bake according to the manufacturer's instructions. Once baked, let the pops cool completely before removing them from the mold.
Step 3: Assemble the Cake Pops
Once the cake pops are cool, insert a cake pop stick into each one. Be gentle to avoid breaking the delicate spheres. If the pops are crumbling, you can use a bit of frosting to help them stick together. This step is crucial, as it sets the foundation for your delicious treats.
Step 4: Dip and Decorate
Melt your candy melts or chocolate in the microwave or a double boiler, stirring frequently to avoid burning. Dip each cake pop into the melted chocolate, ensuring it's fully coated. Tap off any excess chocolate and place the pops on a parchment-lined baking sheet to set. Now comes the fun part: decorating! Get creative with sprinkles, edible glitter, or any other decorations you like.
Tips and Tricks for Perfect Cake Pops
Here are a few tips to help you achieve cake pop perfection:
- Don't overfill the mold cavities, as this can cause the batter to overflow during baking.
- Let the pops cool completely before handling them to prevent them from breaking.
- Use a small amount of frosting to seal any cracks or imperfections in the cake pops.
- Experiment with different flavors of candy melts or chocolate for a unique twist.
- Store your cake pops in an airtight container at room temperature to keep them fresh.
Common Mistakes to Avoid
Even the best bakers make mistakes sometimes, but with a little knowledge, you can avoid these common pitfalls:
- Using too much batter, which can lead to uneven baking and messy results.
- Not letting the pops cool completely before inserting the sticks, causing them to fall apart.
- Forgetting to grease the mold, resulting in stuck cake pops that are difficult to remove.
- Over-decorating, which can make the pops look messy and unappetizing.
Delicious Variations to Try
Once you've mastered the basics, it's time to experiment with different flavors and designs. Here are a few ideas to inspire your creativity:
- Red velvet cake pops with cream cheese frosting
- Chocolate cake pops with peanut butter filling
- Carrot cake pops with cream cheese drizzle
- Strawberry cake pops with white chocolate coating
The possibilities are endless, so don't be afraid to try new things and make the recipe your own. Who knows? You might just discover your new favorite dessert!
How to Store Cake Pops
Proper storage is key to keeping your cake pops fresh and delicious. Store them in an airtight container at room temperature for up to three days. If you want to extend their shelf life, you can freeze them for up to two months. Just make sure to wrap them tightly in plastic wrap and place them in a freezer-safe container to prevent freezer burn.
Kesimpulan
So there you have it, folks! Making cake pops with a cake pop mold is easier than you might think, and the results are absolutely worth it. From preparing the batter to decorating the finished pops, every step of the process is a chance to get creative and have fun. Remember to follow the tips and tricks we've shared, and don't be afraid to experiment with new flavors and designs.
Now that you know how to make cake pops with cake pop mold, why not share your creations with others? Whether it's at a party, a family gathering, or just a casual get-together, these sweet treats are sure to be a hit. And if you're feeling extra proud of your work, don't forget to leave a comment or share this article with your friends. Happy baking, and let the cake pop adventure begin!
Table of Contents
- Why Use Cake Pop Mold?
- Benefits of Using Cake Pop Mold
- What You'll Need to Get Started
- Choosing the Right Cake Pop Mold
- Step-by-Step Guide: How to Make Cake Pops with Cake Pop Mold
- Step 1: Prepare the Cake Batter
- Step 2: Bake the Cake Pops
- Step 3: Assemble the Cake Pops
- Step 4: Dip and Decorate
- Tips and Tricks for Perfect Cake Pops
- Common Mistakes to Avoid
- Delicious Variations to Try
- How to Store Cake Pops
- Kesimpulan
Handyman Seeks Work: Your Ultimate Guide To Finding Carpentry Jobs
Hi By Hismile Smooth Mint Flavoured Toothpaste: Your Ultimate Smile Gamechanger
How To Say I Love You In Yoruba Language: A Beginner's Guide To Expressing Love

How To Make Cake Pops!💕+ Cake Pop Theme Ideas!😃 Trusper

18 Cavity Silicone Cake Pops Mold Cupcake Lollipop Mold Chocolate Mold
How to Make Cake Pops with a Mold In the Kitch
