How To Install Brake Light: A Step-by-Step Guide For Every Car Enthusiast
So here's the deal, folks. Installing a brake light might sound like a daunting task, but trust me, it’s not as scary as it seems. If you’ve been wondering how to install brake light on your ride, you’re in the right place. In this guide, we’ll walk you through everything you need to know, step by step, so you can tackle this project with confidence. Whether you're a DIY enthusiast or just looking to save some cash, this is the perfect solution.
Now, let's get real for a sec. Brake lights are not just some fancy add-on; they’re crucial for safety. Imagine cruising down the highway, and your brake lights decide to go on strike. That’s a recipe for disaster, my friend. By learning how to install brake light yourself, you’re not only ensuring your safety but also showing some love to your wallet. Plus, it’s a pretty rewarding experience when you’re done.
Before we dive into the nitty-gritty, let me assure you that this article is packed with everything you need. We’ll cover tools, parts, common mistakes, troubleshooting tips, and more. So grab a cup of coffee, sit back, and let’s get started on this journey together. Oh, and don’t worry, I’ll make sure it’s easy to follow, even if you’re a complete newbie in the world of car maintenance.
Read also:Wc Swearingen Recreation Area A Hidden Gem For Outdoor Enthusiasts
Why Is Installing Brake Light Important?
Alright, let’s talk about why brake lights matter. It’s not just about compliance with traffic laws (although that’s important too). Brake lights are your car’s way of communicating with other drivers. They signal when you’re slowing down or stopping, giving everyone around you a heads-up. Without them, you’re basically rolling dice with road safety.
Studies show that vehicles with malfunctioning brake lights are involved in more rear-end collisions. According to the National Highway Traffic Safety Administration, faulty brake lights contribute to around 3% of all traffic accidents. That might not sound like much, but it adds up quickly. So, if you’re asking yourself, “Do I really need to fix this?” the answer is a resounding yes.
Plus, let’s not forget the financial side. A busted brake light can earn you a nice little ticket, and if you get pulled over, it’s gonna cost you. Not to mention the repair bill if you leave it unchecked and something worse happens. Learning how to install brake light is a small investment that pays off big time.
Tools and Materials You’ll Need
Before you dive in, you’ll need to gather a few things. Here’s a quick list of tools and materials you’ll need to install brake light properly:
- Socket Set: You’ll need this to remove the bolts holding the light assembly in place.
- Phillips Screwdriver: Some vehicles use screws instead of bolts, so it’s good to have one handy.
- New Brake Light Assembly: Make sure you get the right one for your vehicle’s make and model.
- Wire Stripper: For connecting the wiring if needed.
- Electrical Tape: To insulate any exposed wires.
- Gloves: Protect your hands from grime and sharp edges.
Pro tip: Always double-check the compatibility of the brake light assembly with your vehicle. Nothing’s worse than buying the wrong part and having to return it. And hey, don’t forget to clean your workspace. Nobody likes working in a messy garage.
Step-by-Step Guide: How to Install Brake Light
Step 1: Gather Your Tools and Prep Your Car
First things first, park your car in a safe, well-lit area. Turn off the engine and engage the parking brake. This is crucial for your safety while you’re working. Now, grab all the tools you’ve gathered and lay them out within reach. Trust me, you don’t want to be scrambling around for a screwdriver when you’re halfway through the job.
Read also:Best Hockey Stick Tape Job The Ultimate Guide To Wrapping Like A Pro
Step 2: Remove the Old Brake Light Assembly
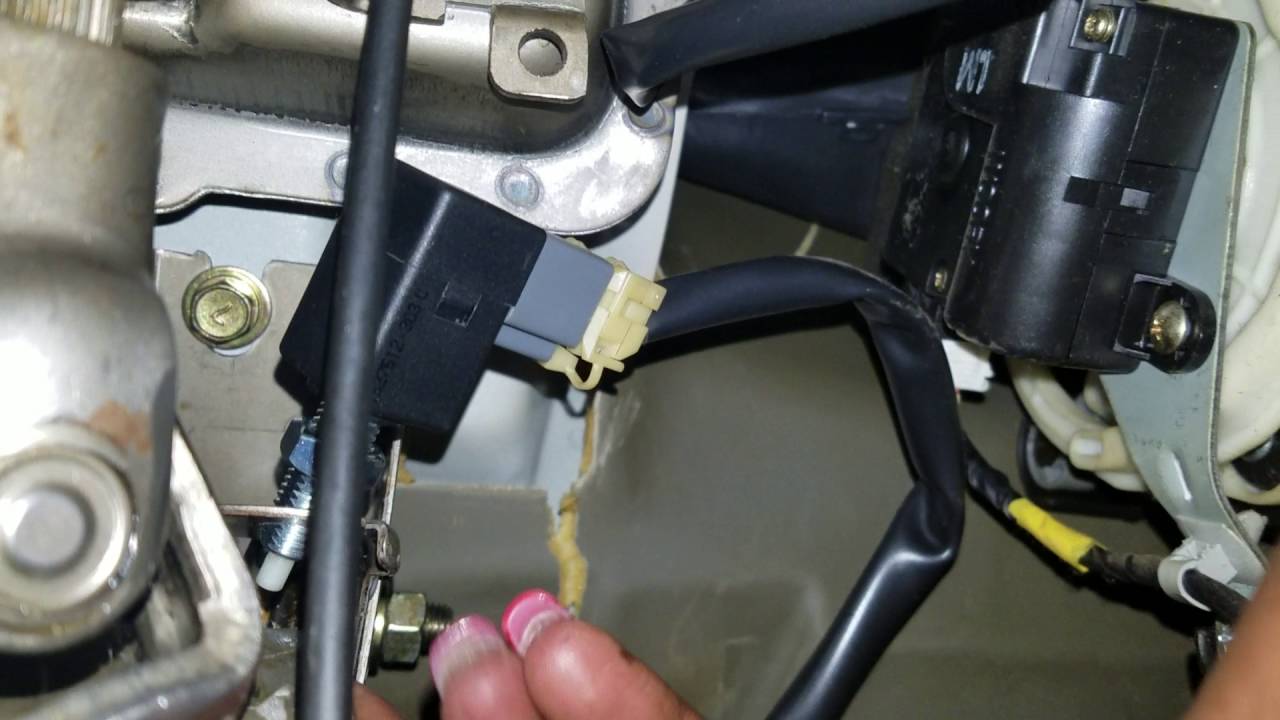
Start by opening the trunk and locating the brake light assembly. Most cars have a cover or panel that you’ll need to remove to access the lights. Use your socket set or screwdriver to take it off. Once you’ve got access, unplug the wiring harness and gently pull the old assembly out. Be gentle here; you don’t want to damage any surrounding components.
Step 3: Install the New Brake Light Assembly
Now it’s time to pop in the new assembly. Align it with the mounting holes and secure it with the bolts or screws you removed earlier. Make sure everything’s snug but don’t overtighten, as that can cause damage. Once the assembly is in place, plug in the wiring harness. If you need to strip any wires, use your wire stripper and insulate them with electrical tape.
Step 4: Test the Lights
Before you call it a day, you need to test the lights. Ask a friend to stand behind the car while you press the brake pedal. They should confirm that the new brake lights are functioning properly. If everything looks good, congratulations! You’ve successfully installed your new brake light.
Common Mistakes to Avoid
Let’s talk about some common pitfalls people run into when installing brake lights. First up, make sure you’re using the right parts. Mixing and matching assemblies from different models can lead to compatibility issues. Another biggie is overtightening the bolts. This can strip the threads or crack the plastic housing. Lastly, don’t forget to test the lights after installation. It’s easy to assume everything’s working, but a quick check can save you a lot of hassle down the road.
Troubleshooting Tips
Even the best-laid plans can hit a snag. If your new brake light isn’t working, here are a few things to check:
- Check the Wiring: Make sure all the connections are secure and there are no exposed wires.
- Inspect the Bulbs: Sometimes the issue isn’t the assembly but the bulbs themselves. Swap them out if needed.
- Test the Fuse: A blown fuse can prevent the lights from working. Check your vehicle’s fuse box and replace any blown fuses.
Remember, troubleshooting is all about patience. Take your time and go through each step methodically. Chances are, you’ll find the issue and have it fixed in no time.
Cost Savings and Benefits
One of the coolest things about learning how to install brake light is the money you save. Professional installations can cost anywhere from $50 to $200, depending on the shop and your location. By doing it yourself, you’re cutting out the labor costs and only paying for the parts. Plus, you’re gaining valuable skills that can come in handy for future projects.
Another benefit? Confidence. Knowing that you can tackle something like this on your own is empowering. It’s like leveling up in life. And hey, who knows? Maybe you’ll discover a hidden talent for car maintenance and start offering your services to friends and family.
Safety Precautions
Let’s not forget the importance of safety. Always wear gloves when working on your car to protect your hands from cuts and chemicals. If you’re working in a dusty environment, consider wearing a mask too. And please, for the love of all things automotive, make sure the car is turned off and the parking brake is engaged. Safety first, folks.
When to Call a Professional
While most brake light installations are straightforward, there are times when it’s best to call in the pros. If you’re dealing with a complex electrical issue or your car’s model requires specialized tools, it might be worth the investment. Remember, your safety is always the top priority.
Final Thoughts
Well, there you have it, folks. A comprehensive guide on how to install brake light like a pro. By following these steps, you’ll not only save money but also ensure your vehicle is safe and roadworthy. Remember, the key to success is preparation and patience. So take your time, enjoy the process, and don’t hesitate to reach out if you have questions.
And hey, don’t forget to share this article with your friends who might find it useful. The more people we can help, the better. Until next time, stay safe and keep those brakes shining bright!
References
For more information on automotive safety and maintenance, check out these trusted resources:
- National Highway Traffic Safety Administration
- Consumer Reports
- AAA
These organizations provide valuable insights and data that can help you make informed decisions about your vehicle’s maintenance.
Table of Contents
- Why Is Installing Brake Light Important?
- Tools and Materials You’ll Need
- Step-by-Step Guide: How to Install Brake Light
- Common Mistakes to Avoid
- Troubleshooting Tips
- Cost Savings and Benefits
- Safety Precautions
- When to Call a Professional
- Final Thoughts
- References
How To Update Firmware On Xfinity Router: A Beginner's Guide
Best XM4 Equalizer Settings: Boost Your Audio Experience
Color Elegante Para Casa: Transform Your Home With Style And Sophistication
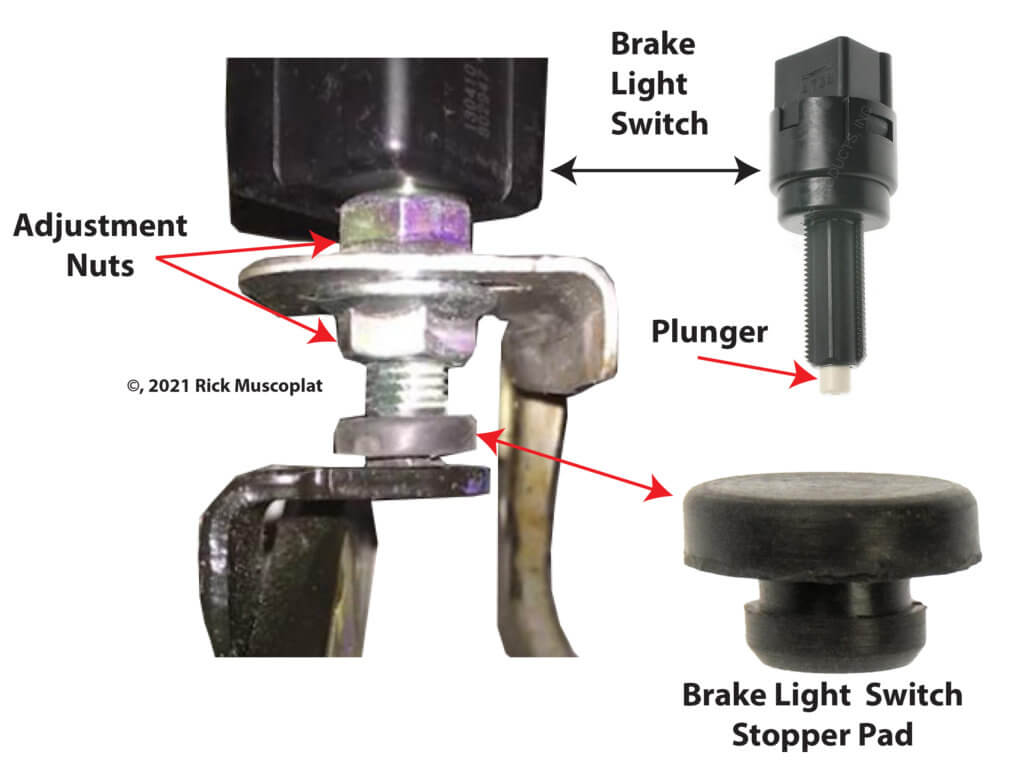
How To Install Brake Light Switch Stopper
How To Install Brake Light Switch Stopper

How To Install Brake Light Switch Stopper
