How To Install Swiffer Wet Jet Pads Like A Pro
Alright, listen up, folks! If you're here, chances are you're trying to figure out how to install Swiffer Wet Jet pads the right way. Let's face it, cleaning can be a drag, but with the Swiffer Wet Jet, life just got a whole lot easier. This little powerhouse is designed to make your floors sparkle without all the hassle. But first, you need to know how to get those pads on properly. So, let's dive in and make sure you're doing it right!
Now, before we get into the nitty-gritty, let me just say that installing Swiffer Wet Jet pads isn't rocket science. But there are a few tricks and tips that can make the process smoother and more effective. Whether you're a seasoned pro or a complete newbie, this guide will walk you through everything you need to know. So, grab your Swiffer, and let's get started!
By the end of this article, you'll not only know how to install the pads but also how to make the most out of your Swiffer Wet Jet. Think of it as a crash course in floor-cleaning excellence. So, buckle up, and let's tackle this together!
Read also:What Is A Broista Your Ultimate Guide To Understanding The Coffee Worldrsquos Cool Kid
Table of Contents
- The Swiffer Wet Jet Overview
- Tools You’ll Need
- Step-by-Step Guide to Install Swiffer Wet Jet Pads
- Pro Tips for Better Results
- Common Mistakes to Avoid
- Troubleshooting Your Swiffer Wet Jet
- Maintaining Your Swiffer Wet Jet
- Exploring Swiffer Wet Jet Pad Variations
- Swiffer Wet Jet vs Other Cleaners
- Wrapping It All Up
The Swiffer Wet Jet Overview
First things first, let's talk about what makes the Swiffer Wet Jet so special. This cleaning tool has become a household favorite because of its ease of use and effectiveness. The Swiffer Wet Jet uses pre-moistened cleaning pads that are designed to tackle dirt, grime, and stains on various floor types. But hey, you can't just slap any old pad on there and expect magic to happen. Proper installation is key to getting the most out of your Swiffer.
And don’t worry, I’m not gonna bore you with a bunch of technical jargon. This is all about making your life easier, not harder. So, whether you’ve got hardwood floors, tiles, or even carpet, the Swiffer Wet Jet has got you covered. Let’s move on to what you’ll need to get started.
Tools You’ll Need
Before we dive into the actual installation process, let’s make sure you’ve got everything you need. Here’s a quick rundown of the essentials:
- Swiffer Wet Jet Mop
- Swiffer Wet Jet Cleaning Pads
- A clean, dry surface to work on
- Your trusty hands (no fancy tools required!)
See? Nothing too crazy. The Swiffer Wet Jet is all about simplicity. Now, let’s get into the juicy details of how to install those pads.
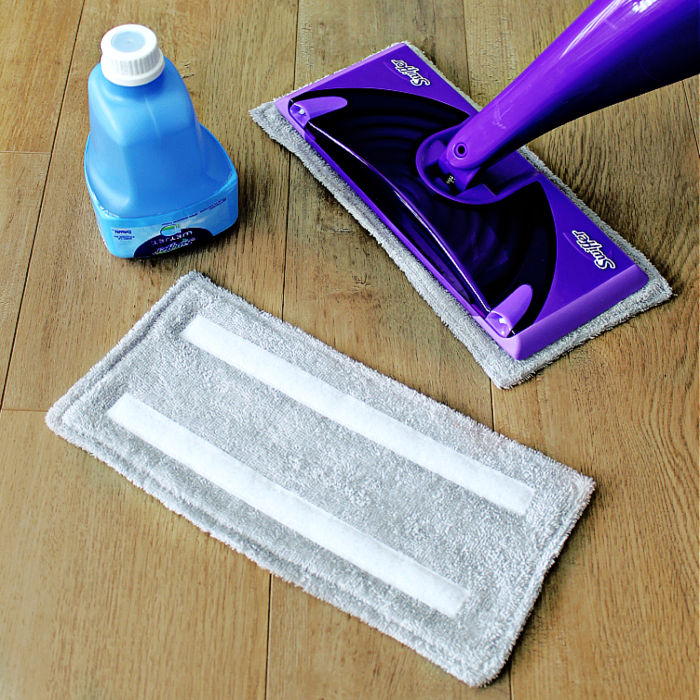
Step-by-Step Guide to Install Swiffer Wet Jet Pads
Alright, here’s where the magic happens. Follow these steps carefully, and you’ll have your Swiffer Wet Jet ready to roll in no time.
Step 1: Prepare Your Swiffer
Start by making sure your Swiffer Wet Jet is in good condition. Check for any debris or old pads that might still be attached. Give it a quick wipe down if needed. You want to start with a clean slate, ya know?
Read also:What Are Pitching Outs Prizepicks Your Ultimate Guide To Winning Big
Step 2: Grab Your Pads
Take one of those pre-moistened cleaning pads out of the package. Don’t be shy; they’re designed to handle whatever mess you throw at them. Make sure you’ve got the right side facing up. The textured side should be on top.
Step 3: Attach the Pad
Now, gently slide the pad onto the Swiffer Wet Jet. Line it up with the grooves on the mop head, and press down firmly. You should hear a little snap, which means it’s secure. Easy peasy, right?
Step>Step 4: Test It Out
Once the pad is on, give your Swiffer a few test swipes. Make sure it’s moving smoothly and that the pad is staying in place. If everything feels good, you’re ready to hit the floors!
Pro Tips for Better Results
Now that you know the basics, let’s talk about some pro tips to take your Swiffer game to the next level.
- Always start with a dry floor to ensure the pad sticks properly.
- Don’t overload the pad with too much liquid. The pre-moistened formula is designed to do the work for you.
- Change pads frequently for the best results. A fresh pad means a cleaner floor.
These little tricks might seem simple, but trust me, they make a big difference.
Common Mistakes to Avoid
Even the best of us make mistakes sometimes. Here are a few common ones to watch out for:
- Forgetting to check the pad alignment. If it’s not lined up properly, it won’t clean effectively.
- Using the wrong type of pad for your floor. Always match the pad to your floor type for the best results.
- Not pressing down firmly enough when attaching the pad. This can lead to it slipping off mid-clean.
Avoid these pitfalls, and you’ll be golden.
Troubleshooting Your Swiffer Wet Jet
Let’s say you’ve followed all the steps, but something’s still not quite right. Here are a few troubleshooting tips:
- If the pad won’t stay on, try cleaning the Swiffer head. Sometimes dirt buildup can cause issues.
- If the mop isn’t gliding smoothly, check for any obstructions or damage to the mop head.
Still having trouble? Don’t hesitate to reach out to Swiffer customer support. They’re there to help!
Maintaining Your Swiffer Wet Jet
Regular maintenance is key to keeping your Swiffer Wet Jet in top shape. Here’s what you should do:
- Clean the mop head regularly to prevent dirt buildup.
- Store your Swiffer in a dry place to avoid damage.
- Check for wear and tear on the handle and trigger mechanism. Replace parts as needed.
A well-maintained Swiffer is a happy Swiffer.
Exploring Swiffer Wet Jet Pad Variations
Did you know there are different types of Swiffer Wet Jet pads? Here’s a quick rundown:
- Standard Cleaning Pads: Great for everyday messes.
- Deep Cleaning Pads: For tackling tough stains and grime.
- Fresh Scent Pads: If you’re all about that clean smell.
Choose the right pad for the job, and you’ll be unstoppable.
Swiffer Wet Jet vs Other Cleaners
So, how does the Swiffer Wet Jet stack up against other cleaning tools? Here’s a quick comparison:
- Convenience: The Swiffer Wet Jet wins hands down for ease of use.
- Effectiveness: While some tools might clean deeper, the Swiffer Wet Jet gets the job done quickly.
- Cost: Generally, the Swiffer Wet Jet is more affordable than some of its competitors.
At the end of the day, it’s all about finding what works best for you.
Wrapping It All Up
Well, there you have it, folks. A comprehensive guide to installing Swiffer Wet Jet pads like a pro. Remember, the key is in the details. Follow the steps, heed the tips, and avoid the mistakes, and you’ll be cleaning like a champ in no time.
Now, it’s your turn. Take what you’ve learned and put it into action. And don’t forget to share your experiences in the comments below. Who knows? You might just inspire someone else to take on their cleaning challenges with confidence.
Thanks for reading, and happy cleaning!
How To Crouch In Fortnite On Xbox One: A Beginner's Guide To Mastering The Basics
How To Prepare A Powder Decoloration Like A Pro
Why Was Daphne Bleeding In Episode 7? Unveiling The Truth Behind The Scene

DIY Swiffer Wet Jet Pads and Refills
DIY Swiffer Wet Jet Pads and Refills

Swiffer Wet Jet Good For Laminate Floors My Bios
