How To Do A Microdermal Piercing: The Ultimate Guide For Enthusiasts
So listen up, my fellow body art lovers! If you're reading this, chances are you're already curious about how to do a microdermal piercing. Let's dive straight into it because this is more than just a piercing; it's an art form. Microdermal piercings, also known as dermal anchors, have become super popular in recent years. They're like mini pieces of jewelry that sit flush against your skin, creating the illusion of a seamless, flawless look. But hey, before you grab your tools, there's a lot you need to know. This guide will walk you through everything from prep to aftercare, so buckle up!
Now, if you're thinking about doing a microdermal piercing yourself, you're not alone. Many people are taking the DIY route these days, but trust me, it's not as simple as sticking a needle through your skin. There's science, technique, and a whole lot of patience involved. You don't want to mess this up, right? That's why we're here—to give you all the info you need to make the right decisions.
Let’s face it, microdermals are not your average piercings. They require precision, cleanliness, and a good understanding of how your body reacts to foreign objects. This article will be your go-to resource for learning how to do a microdermal piercing safely and effectively. Whether you're a pro or a newbie, there's something here for everyone. So, let's get started!
Read also:What Is A Tapout Session Tattoo The Ultimate Guide For Ink Enthusiasts
What Exactly Is a Microdermal Piercing?
First things first, let's break down what a microdermal piercing actually is. Think of it as a small piece of jewelry anchored into your skin. Unlike traditional piercings that go through both sides of your skin, microdermals only penetrate one layer. The anchor sits under your skin, while the top part—the jewelry—sits flush on the surface. It's like having a tiny stud without the hassle of a full piercing.
Microdermals are versatile, too. You can place them almost anywhere on your body, from your collarbone to your ribs, or even your face. The possibilities are endless, but remember, not all areas are created equal. Some spots might heal faster than others, and some might be more prone to irritation. We'll cover all of this later, but for now, just know that microdermals are a game-changer in the world of body art.
Why Choose Microdermals?
There are plenty of reasons why people opt for microdermal piercings. For starters, they're low-profile and super stylish. Unlike traditional piercings, microdermals don't have a visible back, which makes them ideal for people who want something subtle yet striking. Plus, they're relatively easy to remove if you change your mind down the line.
Another great thing about microdermals is that they're customizable. You can choose from a variety of jewelry styles, from simple studs to intricate designs. This flexibility allows you to express your personality and creativity. Whether you're into minimalism or bold statements, there's a microdermal for you.
Benefits of Microdermal Piercings
- Low-profile design
- Customizable jewelry options
- Easy to remove
- Less visible than traditional piercings
- Perfect for creative expression
Is Microdermal Piercing Safe?
Here's the million-dollar question: Is it safe to do a microdermal piercing at home? The short answer is, it depends. If you follow proper hygiene practices and use sterilized equipment, the risk of infection is minimal. However, if you skip these steps or rush the process, things can go south pretty quickly. That's why it's crucial to educate yourself before attempting anything.
One of the biggest concerns with microdermals is rejection. Since the anchor sits under your skin, there's always a chance your body might reject it. This is more common in areas with a lot of movement, like the ribs or fingers. To minimize the risk, make sure you choose a spot that's relatively flat and stable. And, of course, follow all aftercare instructions to the letter.
Read also:What Is A Place Holder In A Relationship Unlocking The Truth Behind This Modernday Phenomenon
Common Risks and How to Avoid Them
Let's talk about the risks for a sec. While microdermals are generally safe, there are a few things you should watch out for:
- Infection: Always sterilize your tools and keep the area clean during healing.
- Rejection: Choose a stable placement and avoid touching the piercing too much.
- Migration: This happens when the anchor moves under the skin. Proper placement can help prevent this.
What You Need to Get Started
Alright, so you've decided to give it a shot. What do you need to get started? First off, you'll need the right tools. A good quality dermal anchor and jewelry are essential. Don't skimp on this part because cheap materials can lead to irritation and even infection. You'll also need a sterilized needle, gloves, and a clean workspace.
Here's a quick checklist of everything you'll need:
- Dermal anchor and jewelry
- Sterilized needle
- Medical-grade gloves
- Alcohol swabs
- Antiseptic solution
- Clean workspace
Where to Buy Quality Tools
When it comes to buying tools for your microdermal piercing, quality matters. Look for reputable suppliers who specialize in body jewelry and piercing equipment. Websites like Etsy and Amazon have a ton of options, but make sure you read reviews and check the seller's credentials. You don't want to end up with subpar tools that could compromise your safety.
Step-by-Step Guide: How to Do a Microdermal Piercing
Now that you have everything you need, let's dive into the step-by-step process. This part is where the magic happens, but remember, take your time and be patient. Rushing can lead to mistakes, and trust me, you don't want that.
Step 1: Clean Your Workspace
Before you even touch your tools, make sure your workspace is spotless. Wipe down all surfaces with an antiseptic solution and lay out your tools in an organized manner. This will help prevent contamination and make the process smoother.
Step 2: Sterilize Your Tools
Sterilization is key when it comes to piercings. Use an autoclave if you have access to one, or at the very least, soak your tools in a disinfectant solution for several minutes. Don't skip this step—it's crucial for your safety.
Step 3: Prepare the Area
Clean the area you plan to pierce with an alcohol swab. Make sure it's completely dry before proceeding. You might want to mark the spot with a pen to ensure accuracy. Precision is key here, so take your time.
Step 4: Insert the Anchor
Now comes the tricky part—inserting the anchor. Use the needle to create a small incision, then carefully slide the anchor under the skin. This part requires steady hands and focus, so make sure you're calm and collected.
Step 5: Attach the Jewelry
Once the anchor is in place, attach the jewelry. Make sure it's secure but not too tight. You want it to sit flush against your skin without causing discomfort. Double-check everything before moving on.
Aftercare Tips for Your Microdermal Piercing
Congratulations! You've successfully done a microdermal piercing. Now comes the hardest part—aftercare. Proper aftercare is essential for ensuring your piercing heals properly and stays infection-free. Here are some tips to help you out:
- Clean the area twice a day with a saline solution.
- Avoid touching the piercing with unwashed hands.
- Stay away from pools, hot tubs, and other bodies of water.
- Don't pick at the scabs or force the piercing to heal faster.
Signs of Infection
Keep an eye out for any signs of infection. These include redness, swelling, excessive pain, or discharge. If you notice any of these symptoms, contact a professional immediately. It's better to be safe than sorry.
Where to Go if Things Go Wrong
Let's face it, even the best-laid plans can go awry. If something doesn't seem right with your microdermal piercing, don't hesitate to seek help. A licensed piercer or dermatologist can assess the situation and provide guidance. Remember, your health and safety should always come first.
How to Remove a Microdermal Piercing
Decided it's not for you? No problem. Removing a microdermal piercing is relatively simple. Just unscrew the jewelry and gently pull out the anchor. Make sure to clean the area afterward to prevent infection.
Conclusion: Are Microdermal Piercings Right for You?
So there you have it, folks! Everything you need to know about how to do a microdermal piercing. From prep to aftercare, we've covered all the bases. Remember, this is a personal decision, and it's important to weigh the pros and cons before diving in. If you're ready to take the plunge, make sure you do it safely and responsibly.
Before you go, I want to leave you with one final thought: Body art is a form of self-expression, and microdermals are just one way to showcase your unique style. Whether you're a seasoned pro or a first-timer, always prioritize safety and hygiene. And hey, if you have any questions or tips of your own, feel free to drop them in the comments below. Let's keep the conversation going!
Table of Contents
- What Exactly Is a Microdermal Piercing?
- Why Choose Microdermals?
- Is Microdermal Piercing Safe?
- What You Need to Get Started
- Step-by-Step Guide: How to Do a Microdermal Piercing
- Aftercare Tips for Your Microdermal Piercing
- Where to Go if Things Go Wrong
- How to Remove a Microdermal Piercing
- Conclusion: Are Microdermal Piercings Right for You?
How To Find How Many Neutrons In An Element: A Simple Guide For Science Enthusiasts
Biscoff Spread Alternative: The Ultimate Guide To Finding Your New Favorite Treat
Bone Tattoos On Hand: A Bold Statement For The Bold At Heart
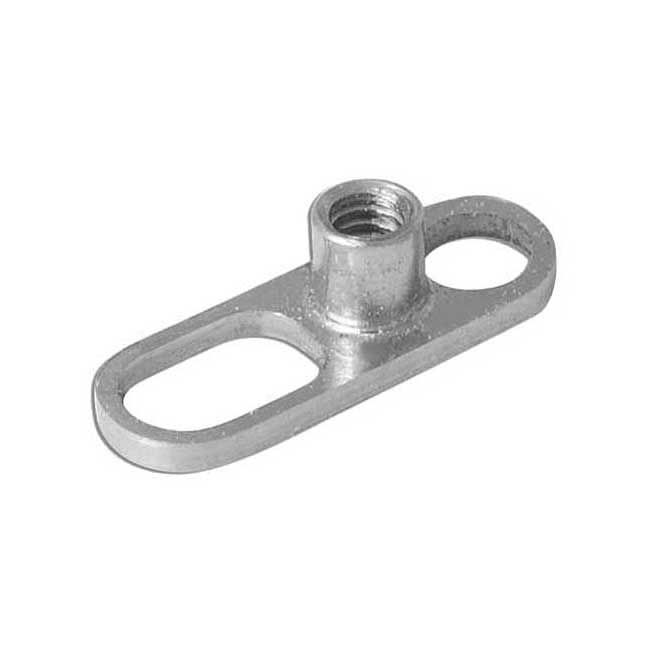
TITANIUM MICRODERMAL PIERCING BASE

Micro Dermal Piercing Procedure, Healing, Aftercare, Cost & Pictures
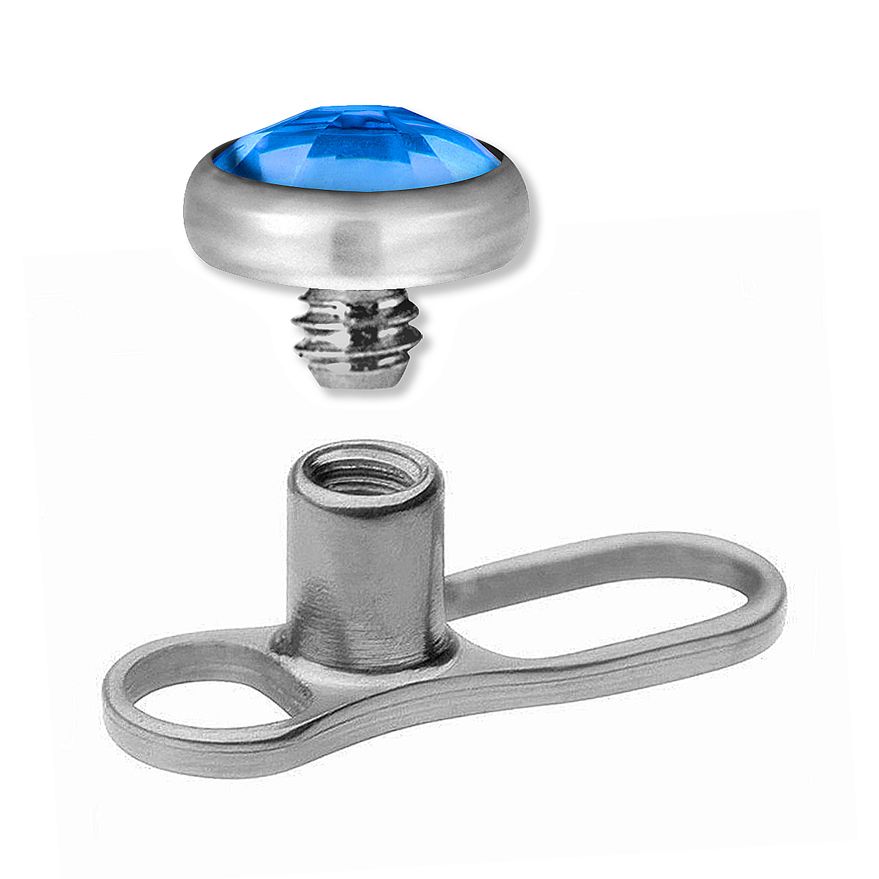
MICRODERMAL PIERCING AND PREMIUM CRYSTAL
