How To Fix A Snagged Shirt: A Comprehensive Guide For Every Closet Crisis
Let’s face it—snags happen. Whether you're rushing out the door or dancing the night away, that unexpected snag on your favorite shirt can feel like the end of the world. But guess what? It doesn’t have to be. Fixing a snagged shirt is easier than you think, and with the right tools and techniques, you can save your favorite pieces from the trash bin.
Picture this: you’re getting ready for an important event, and BAM—a snag ruins the vibe. Don’t panic. This guide will walk you through how to fix a snagged shirt step by step, so you can breathe easy knowing your wardrobe is safe in your hands.
From quick fixes for minor snags to more advanced techniques for major damage, we’ve got you covered. Let’s dive into the world of shirt repair and turn those closet disasters into DIY triumphs.
Read also:Wc Swearingen Recreation Area A Hidden Gem For Outdoor Enthusiasts
Understanding What Causes Snags
Before we jump into the "how-to" part, let’s take a moment to understand why snags happen in the first place. Knowledge is power, right? Snags occur when fibers in your fabric get pulled or stretched, usually due to friction or sharp objects. Think about zippers, belts, or even your car seatbelt—these little culprits can wreak havoc on your clothes.
Knowing the common causes of snags can help you prevent them in the future. Here’s a quick rundown:
- Sharp objects like jewelry or belt buckles
- Rough surfaces like furniture or car seats
- Improper storage (hanging clothes in a cramped closet)
- Washing and drying clothes with zippers or hooks
Now that we’ve identified the enemy, let’s talk solutions.
What You Need to Fix a Snagged Shirt
Fixing a snagged shirt doesn’t require a lot of fancy tools. In fact, you probably already have everything you need right at home. Here’s a list of essentials:
- Needle (sharp and fine)
- Thread (matching the color of your shirt)
- Scissors
- Clear nail polish or fabric glue (optional)
- Seam ripper (optional)
These items are your best friends when it comes to shirt repair. Keep them handy, and you’ll be ready to tackle any snag that comes your way.
Step-by-Step Guide: How to Fix a Snagged Shirt
Step 1: Assess the Damage
Not all snags are created equal. Some are minor and can be fixed in seconds, while others might require a bit more effort. Take a close look at the snag and determine its severity. Is it just a small pull, or has the fabric actually torn? This will help you decide which method to use.
Read also:Feliz Dia De San Valentin Esposo A Love Story Thats All About You And Your Partner
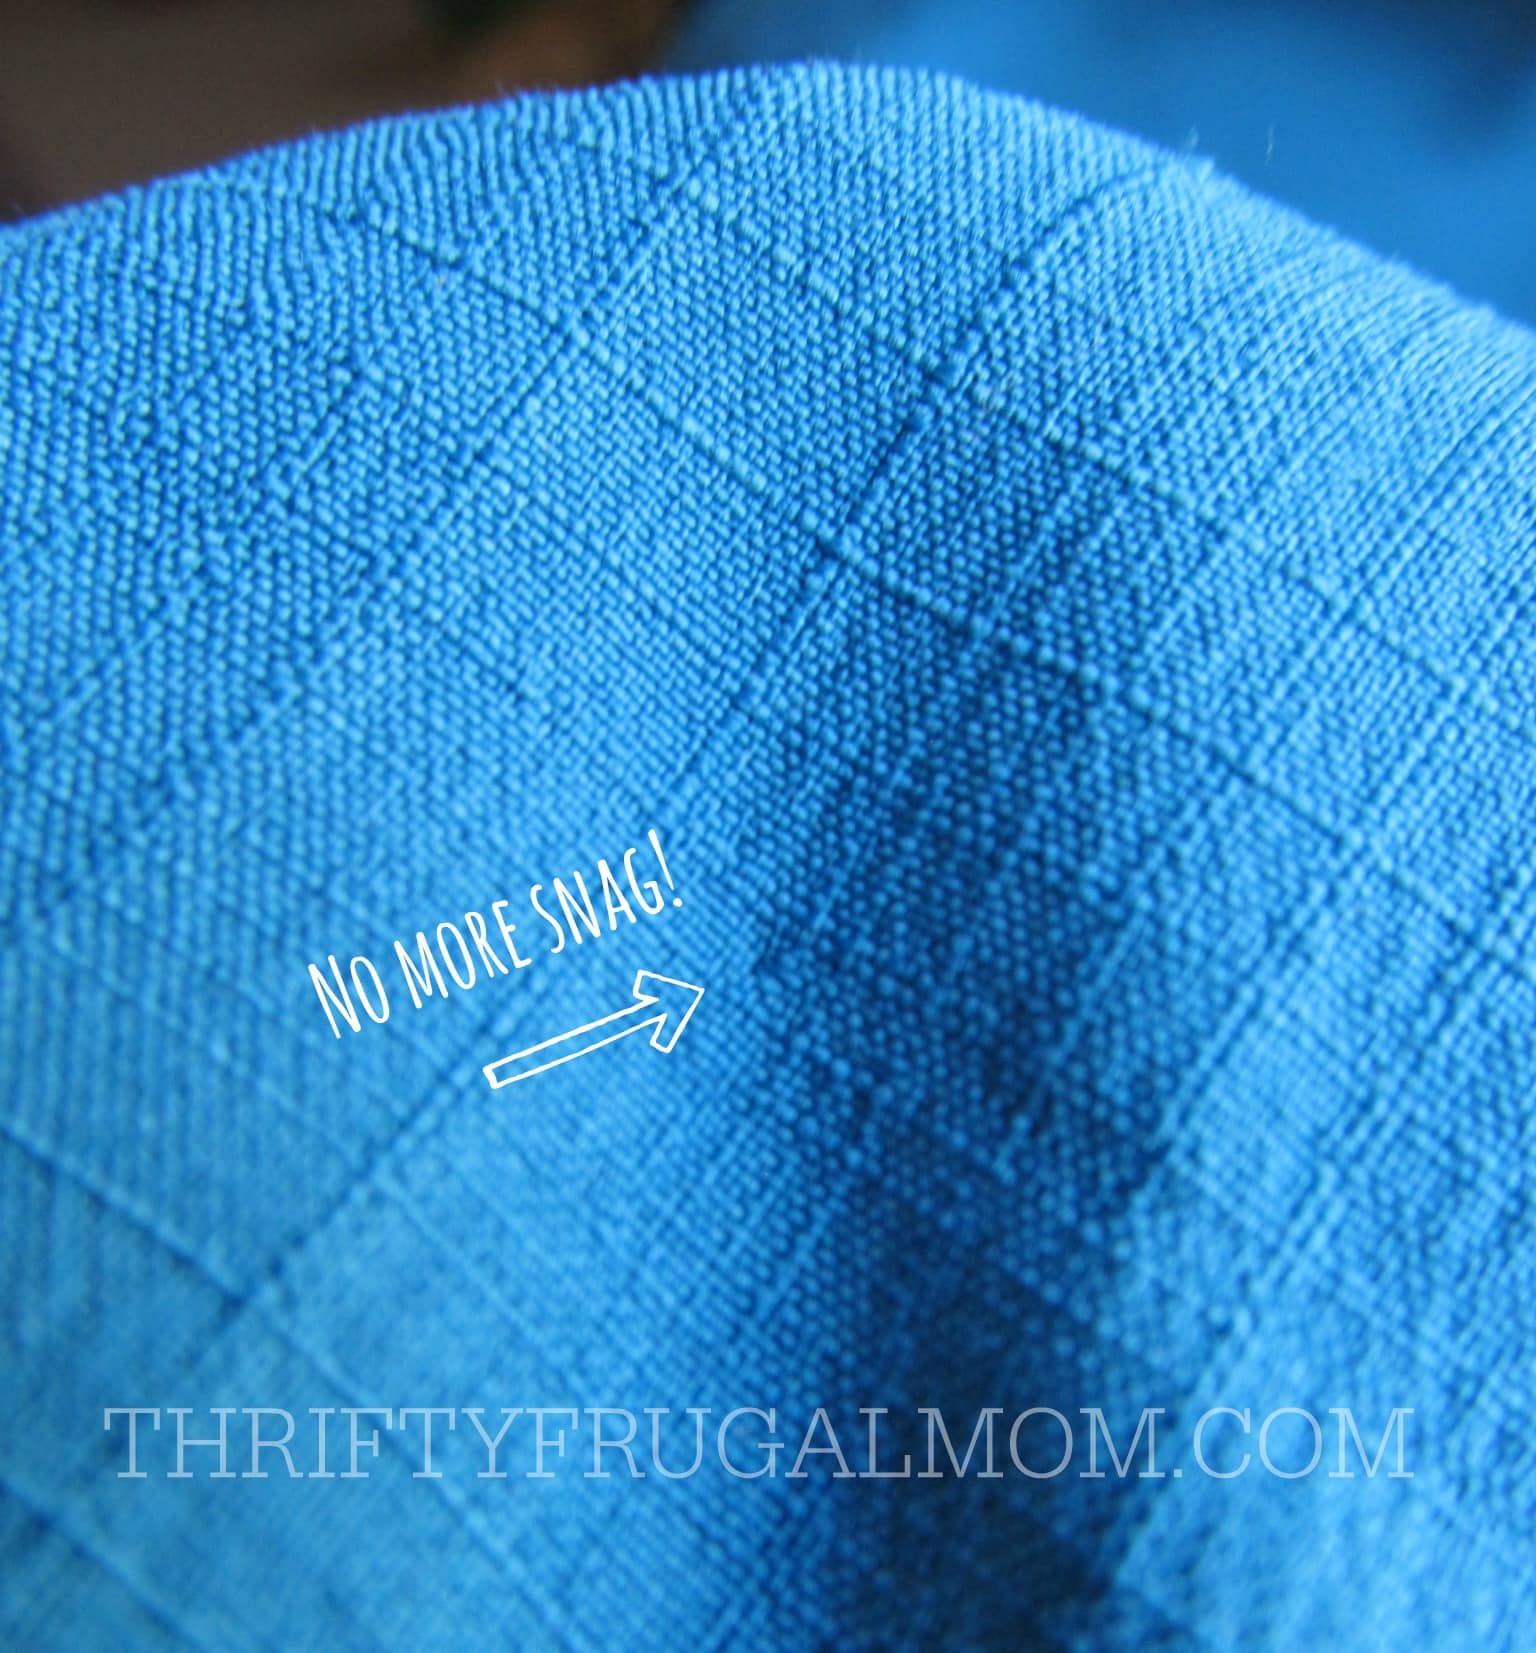
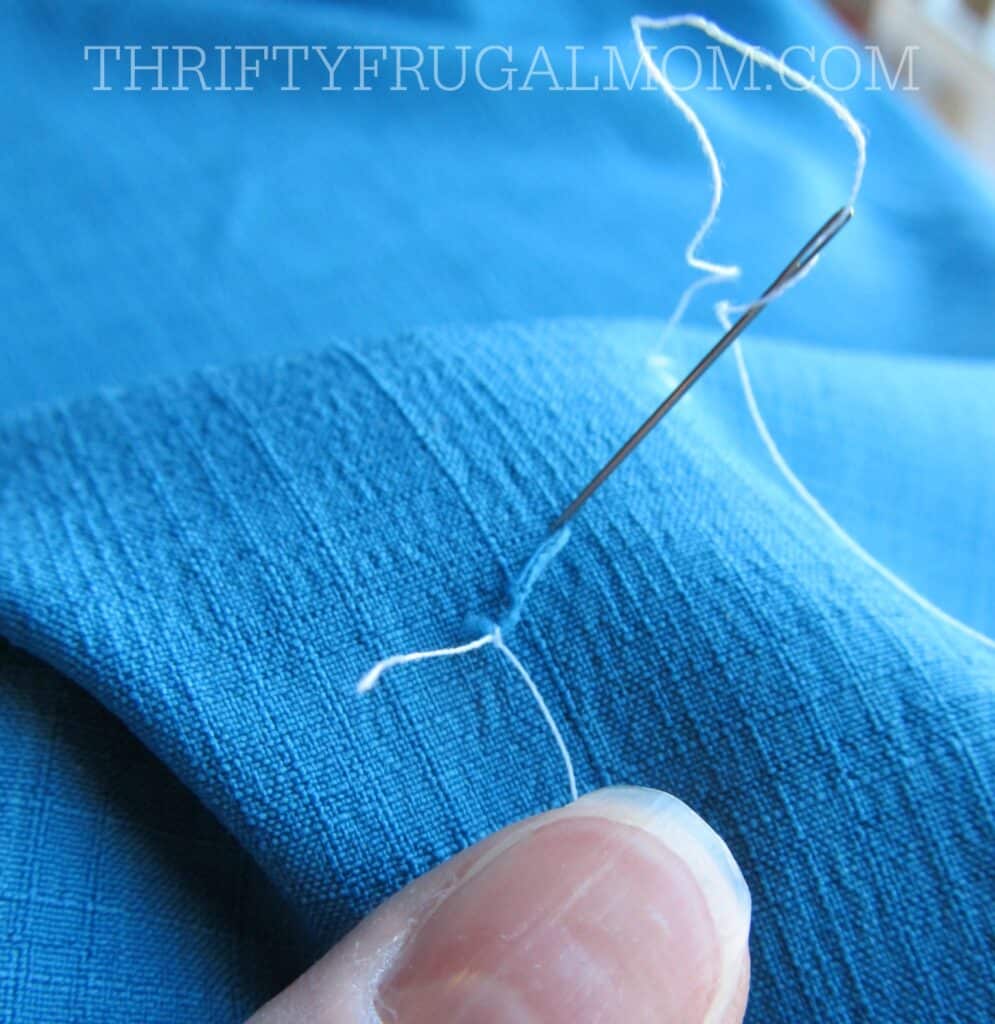
Step 2: Use a Needle to Weave the Snag Back
This is one of the most effective ways to fix a snagged shirt. Here’s how you do it:
- Thread a needle with a matching thread color.
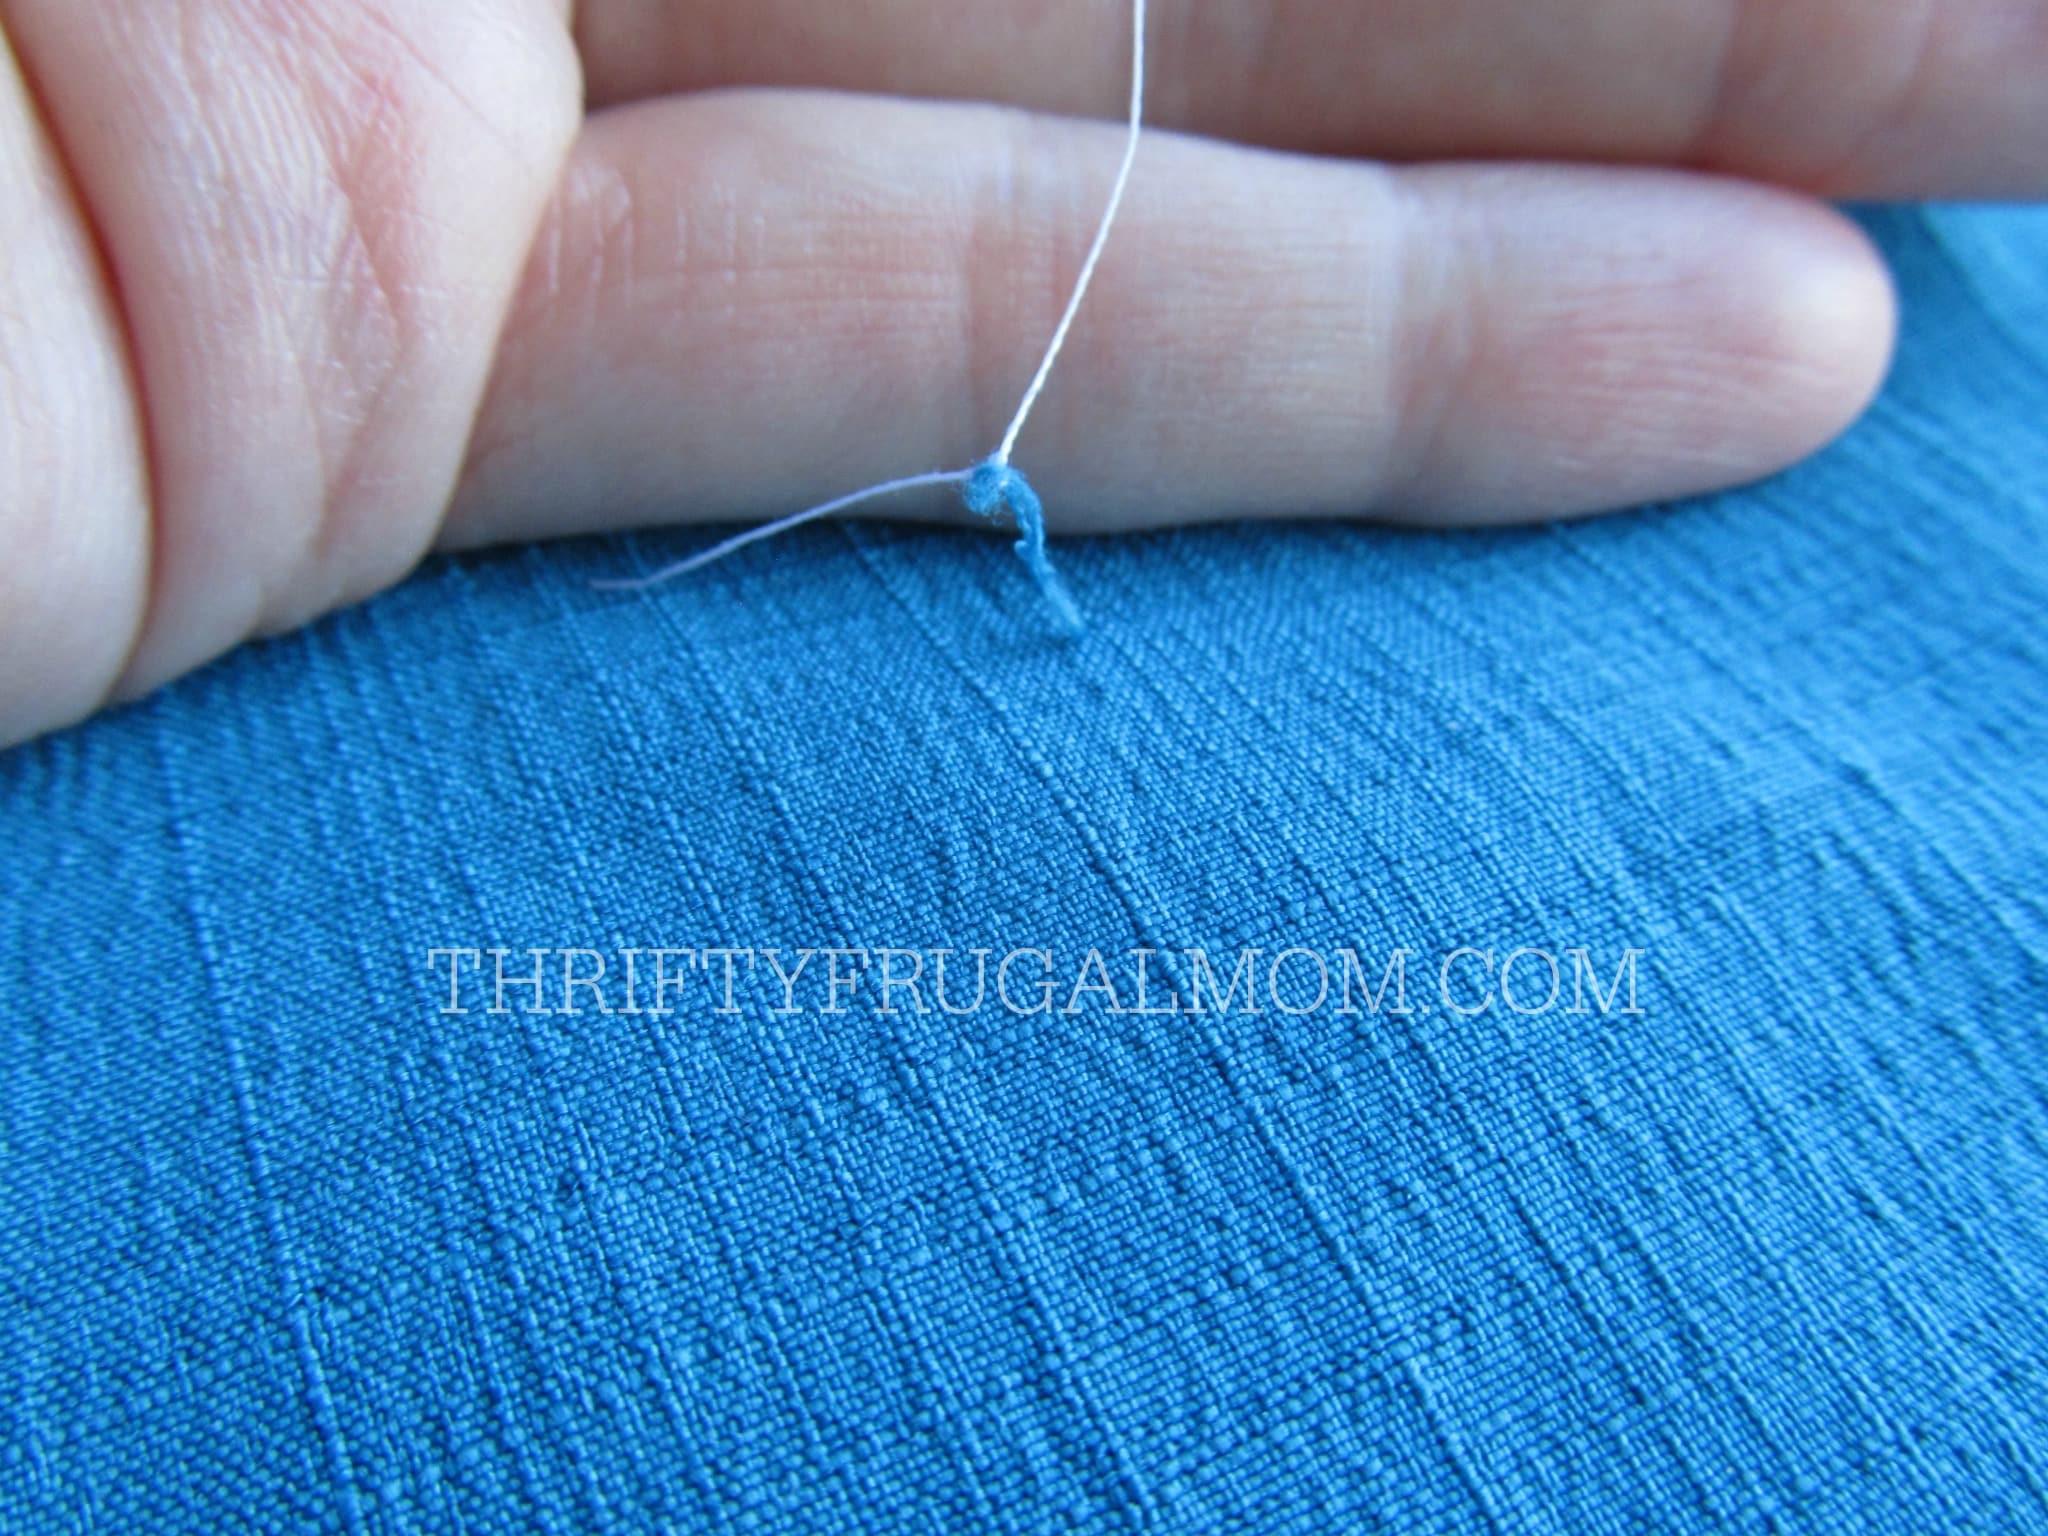
- Gently weave the needle through the snag, pushing the pulled fibers back into place.
- Tie a small knot at the end to secure the repair.
Voilà! Your shirt should look good as new.
Alternative Methods for Fixing Snags
Not feeling confident with a needle and thread? No worries. There are other methods you can try:
Option 1: Use Clear Nail Polish
This is a quick fix for minor snags. Simply apply a small amount of clear nail polish to the snagged area. Let it dry completely, and the fibers should stick together, preventing further damage.
Option 2: Apply Fabric Glue
Fabric glue is another great option for securing snags. Just dab a tiny bit onto the affected area and let it dry. Be careful not to use too much, as it can stiffen the fabric.
Option 3: Trim the Snag
If the snag is too small to fix with a needle, you can carefully trim it with scissors. Make sure to cut as close to the fabric as possible without damaging the surrounding area.
Preventing Future Snags
Prevention is key when it comes to maintaining your wardrobe. Here are some tips to keep your clothes snag-free:
- Store clothes properly to avoid friction.
- Avoid wearing jewelry that could catch on fabric.
- Turn clothes inside out before washing.
- Use garment bags for delicate items.
By following these simple steps, you can extend the life of your favorite shirts and reduce the chances of future snags.
Common Mistakes to Avoid
While fixing a snagged shirt might seem straightforward, there are a few mistakes you should avoid:
- Pulling the snag too hard, which can make the damage worse.
- Using mismatched thread colors, which can ruin the appearance of your shirt.
- Overusing glue or nail polish, which can damage the fabric.
Take your time and be patient. Rushing the process can lead to more problems down the line.
Advanced Techniques for Major Snags
What if the snag is beyond the basic fixes? Don’t worry—we’ve got advanced techniques for you:
Method 1: Use a Seam Ripper
If the snag is too deep, you can use a seam ripper to carefully cut the pulled thread. Then, reweave the thread using a needle and thread.
Method 2: Patch the Area
For larger tears, consider using a fabric patch. Cut a small piece of matching fabric and sew it onto the damaged area. This will reinforce the fabric and prevent further tearing.
When to Call in the Professionals
Sometimes, a snag is just too big to handle on your own. If the damage is extensive or the shirt is particularly valuable, it might be worth taking it to a professional tailor. They have the expertise and tools to fix even the toughest snags.
DIY Shirt Repair: A Skill Worth Mastering
Learning how to fix a snagged shirt is more than just a practical skill—it’s a confidence booster. Knowing you can rescue your favorite pieces from the brink of disaster is empowering. Plus, it saves you money in the long run.
Final Thoughts
Fixing a snagged shirt might seem intimidating at first, but with the right tools and techniques, it’s a breeze. Remember to assess the damage, choose the appropriate method, and take your time. And if all else fails, don’t hesitate to seek professional help.
So, the next time you encounter a snag, don’t panic. Grab your needle and thread, and show that shirt who’s boss. And don’t forget to share your success stories in the comments below. Let’s build a community of DIY fashionistas!
Table of Contents
- Understanding What Causes Snags
- What You Need to Fix a Snagged Shirt
- Step-by-Step Guide: How to Fix a Snagged Shirt
- Alternative Methods for Fixing Snags
- Preventing Future Snags
- Common Mistakes to Avoid
- Advanced Techniques for Major Snags
- When to Call in the Professionals
- DIY Shirt Repair: A Skill Worth Mastering
- Final Thoughts
Now go forth and conquer those closet disasters! You’ve got this.
Cat Keeps Rolling Around: Why It Happens And What You Can Do
Costco Frozen Pretzels Cooking Instructions: The Ultimate Guide To Perfectly Golden Pretzels
How To Get A Single Dorm In College: Your Ultimate Guide
How to Easily Fix Snagged Clothing Thrifty Frugal Mom
How to Easily Fix Snagged Clothing Thrifty Frugal Mom
How to Easily Fix Snagged Clothing Thrifty Frugal Mom
