How To Install Drywall Around Windows: A Step-by-Step Guide
Installing drywall around windows can seem intimidating, but with the right approach, it's a task anyone can tackle. Whether you're remodeling your home or building from scratch, mastering this skill will save you money and give you a sense of accomplishment. Drywall installation is one of those projects that looks complicated, but once you break it down, it’s pretty straightforward. So, let’s dive into the nitty-gritty details and make sure you nail it—or rather, screw it—perfectly!
When it comes to home improvement, knowing how to install drywall around windows is a game-changer. It’s not just about slapping some sheets up; it’s about precision, technique, and a little bit of patience. The process might seem overwhelming at first, but trust me, by the end of this guide, you’ll be ready to take on any drywall project like a pro.
Before we get started, let’s talk about why this skill is so important. Drywall installation isn’t just about aesthetics—it’s about creating a solid structure that enhances your home’s value and comfort. When done right, it adds a polished finish to your windows, making them look sleek and professional. So, grab your tools, roll up your sleeves, and let’s get started!
Read also:Black Widget Pictures Elevate Your Design Game With These Stunning Ideas
Table of Contents
- Tools and Materials You’ll Need
- Preparation is Key
- Measuring the Area Around the Window
- Cutting the Drywall to Size
- Installing the Drywall
- Finishing Touches
- Pro Tips for Perfect Installation
- Common Mistakes to Avoid
- FAQs About Installing Drywall Around Windows
- Wrapping It Up
Tools and Materials You’ll Need
Alright, let’s start with the basics. Before you even think about installing drywall around your windows, you need to gather the right tools and materials. This isn’t a DIY project where you can wing it—having the right equipment makes all the difference. Here’s what you’ll need:
Tools
- Measuring tape
- Utility knife
- Drywall saw
- Drill with a drywall screw bit
- T-square or straight edge
- Screwdriver or drywall screw gun
- Sandpaper or drywall sanding sponge
- Joint compound
- Taping knife
Materials
- Drywall sheets (choose the right thickness for your project)
- Drywall screws
- Drywall tape
- Compound mud
Now that you’ve got your toolkit ready, let’s move on to the next step. But remember, having the right tools is only half the battle. Knowing how to use them is what separates the amateurs from the pros.
Preparation is Key
Here’s the deal: preparation is everything. If you skip this step, you’re setting yourself up for failure. Start by clearing the area around the window. Remove any furniture, curtains, or decorations that might get in the way. You don’t want to be tripping over stuff while trying to focus on precision.
Next, inspect the area for any obstructions or irregularities. Make sure the window frame is secure and level. If it’s not, you’ll need to fix it before proceeding. This step might seem tedious, but trust me, it’ll save you a lot of headaches later on.
Oh, and don’t forget to protect your floors! Lay down some drop cloths or plastic sheeting to catch any debris or dust. Drywall installation can get messy, so it’s better to be safe than sorry.
Measuring the Area Around the Window
Measuring is one of the most crucial steps in installing drywall around windows. You can’t just eyeball it and hope for the best. Grab that measuring tape and get to work. Measure the height and width of the area around the window, including any corners or angles.
Read also:How To Cut A Habanero Pepper A Spicy Guide To Mastering The Heat
Here’s a pro tip: always add a little extra to your measurements. It’s easier to cut down a piece of drywall than it is to try and stretch it to fit. Write down your measurements so you don’t forget them later. Trust me, you’ll thank yourself for this later.
Double-Check Your Measurements
Measure twice, cut once. This old adage still holds true today. Take a moment to double-check your measurements before moving on to the cutting phase. It might seem like a waste of time, but it’ll save you from costly mistakes down the line.
Cutting the Drywall to Size
Now comes the fun part—cutting the drywall. This step requires a steady hand and a sharp utility knife. Start by marking your measurements on the drywall sheet with a pencil. Use a T-square or straight edge to ensure your lines are straight and accurate.
Once you’ve marked the sheet, score the drywall along the line using your utility knife. Don’t press too hard—you just want to create a groove. Then, flip the sheet over and snap it along the score line. Finally, use your knife to trim off the excess paper backing. Voilà! You’ve got a perfectly sized piece of drywall.
If you need to cut around the window frame, use a drywall saw for precision. This tool is designed to handle tight spaces and curves, so it’ll make your job much easier.
Installing the Drywall
With your drywall pieces cut to size, it’s time to install them around the window. Start by positioning the first sheet against the window frame. Use your drill and drywall screws to secure it in place. Make sure the screws are evenly spaced and don’t protrude from the surface.
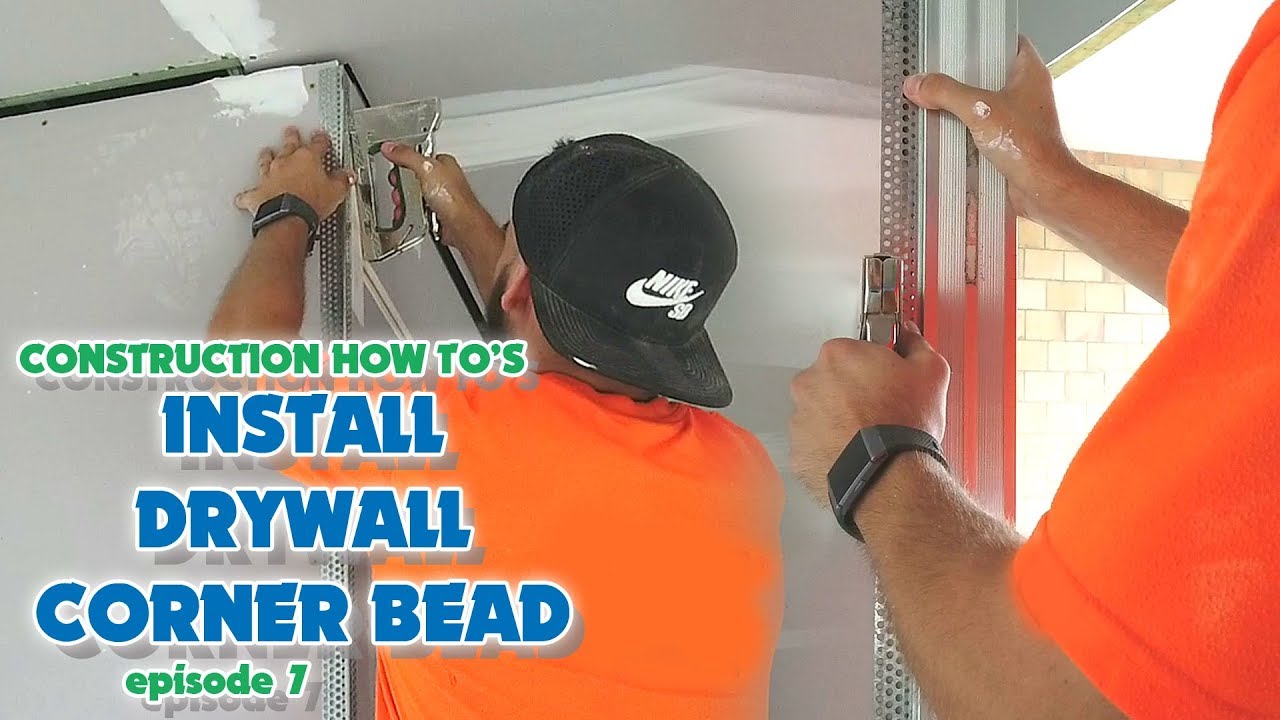
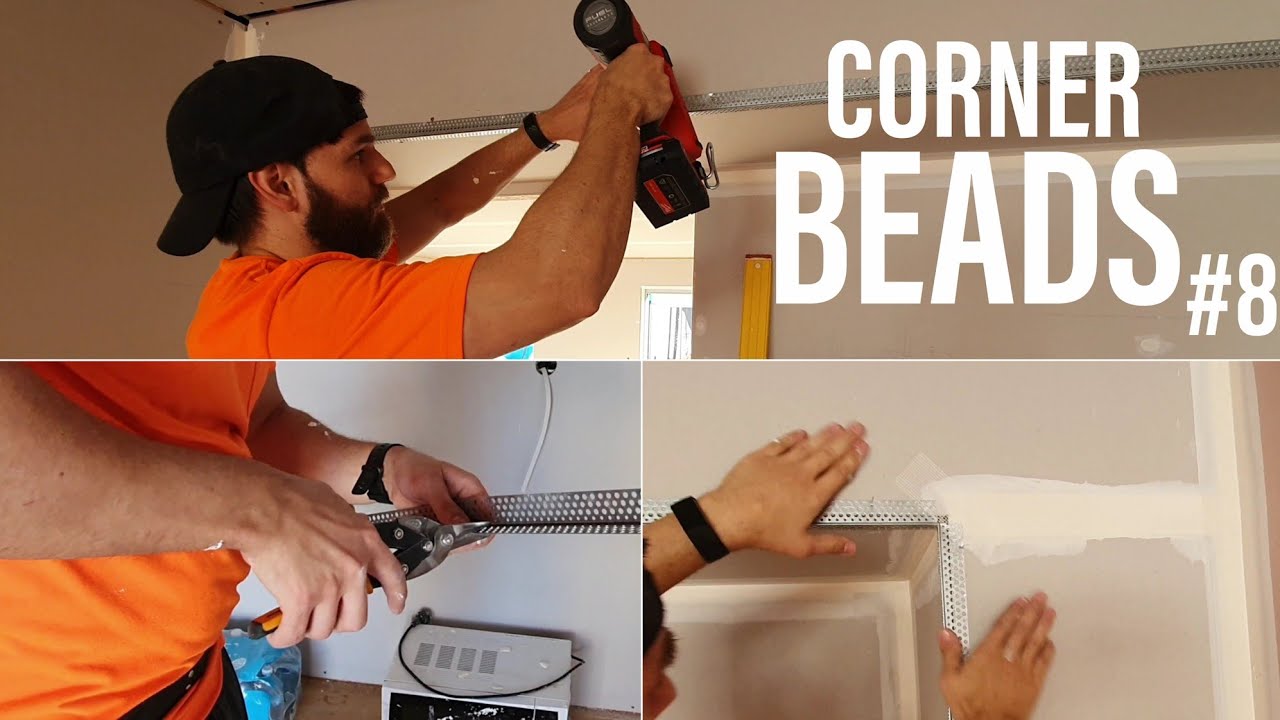
For corners, you might need to use corner bead for added strength and a clean finish. Simply attach the bead with nails or screws, making sure it’s flush with the drywall surface.
Securing the Drywall
As you install each piece, check for levelness and alignment. If something doesn’t look right, adjust it before moving on to the next piece. Once all the sheets are in place, take a step back and admire your handiwork. It’s starting to look pretty good, isn’t it?
Finishing Touches
Now that the drywall is installed, it’s time to add the finishing touches. This is where the real magic happens. Start by applying joint compound to the seams and screw heads. Use a taping knife to smooth it out, creating a seamless surface.
Once the compound is dry, sand it down with fine-grit sandpaper. Be gentle—drywall dust can get everywhere! After sanding, apply a second coat of compound for added smoothness. Repeat this process until the surface is flawless.
Painting the Drywall
With the finishing touches complete, it’s time to paint the drywall. Choose a paint color that complements your window and surrounding walls. Use a high-quality brush or roller to apply the paint evenly. Two coats are usually enough to achieve a professional look.
Pro Tips for Perfect Installation
Here are a few extra tips to help you achieve perfection:
- Use a laser level for precise alignment.
- Keep a damp cloth nearby to wipe away any excess compound.
- Work in small sections to avoid fatigue.
- Take breaks if you need to—rushing can lead to mistakes.
These tips might seem small, but they can make a big difference in the final result. Remember, drywall installation is as much about patience as it is about skill.
Common Mistakes to Avoid
Even the best of us make mistakes sometimes. Here are a few common ones to watch out for:
- Not measuring accurately.
- Using the wrong type of screws.
- Over-sanding the compound.
- Forgetting to clean up as you go.
By avoiding these pitfalls, you’ll be well on your way to a successful drywall installation. Trust me, the pros make these mistakes too—it’s all part of the learning process.
FAQs About Installing Drywall Around Windows
Got questions? Here are some answers to common queries:
How long does it take to install drywall around a window?
On average, it takes about 2-3 hours for a beginner to complete this task. With practice, you’ll get faster.
Can I do this alone, or do I need help?
While it’s possible to do it alone, having a helper can make the process much easier, especially when lifting heavy sheets of drywall.
What type of drywall should I use?
For most residential projects, 1/2-inch drywall is ideal. However, if you’re dealing with moisture-prone areas, consider using moisture-resistant drywall.
Wrapping It Up
Installing drywall around windows isn’t as scary as it seems. With the right tools, materials, and techniques, you can achieve professional results. Remember to measure carefully, cut precisely, and take your time with the finishing touches. Before you know it, your windows will look polished and ready for the next chapter of your home improvement journey.
So, what are you waiting for? Grab your tools and get to work! And don’t forget to share your progress with us in the comments below. We’d love to hear about your experience and see how your project turned out. Happy building!
Bubble Popping Sound In Eye: Why It Happens, What It Means, And How To Fix It
Hydrangea Hedge Ideas: Transform Your Garden Into A Lush Paradise
Chick-fil-A Vs KFC: The Ultimate Battle For Your Fried Chicken Cravings

Best way to install drywall around doors and windows. construction
How To Install Drywall Corner Bead Around Windows
How To Install Drywall Corner Bead Around Windows
