How To Install Capacitor In Ceiling Fan: A Step-by-Step Guide
Installing a capacitor in your ceiling fan might sound intimidating, but it’s easier than you think. Whether you’re replacing an old capacitor or installing one for the first time, having the right information can make all the difference. In this guide, we’ll walk you through everything you need to know about installing a capacitor in your ceiling fan. So, let’s dive in and get started!
If your ceiling fan starts acting up—spinning slower, making weird noises, or not turning on at all—it could be a sign that the capacitor needs replacing. A capacitor is essentially the heart of your fan’s motor system, and when it goes bad, your fan won’t work properly. Don’t worry, though! Replacing a capacitor isn’t as scary as it sounds.
This article is packed with practical tips, step-by-step instructions, and some helpful tricks to make the process smooth and simple. We’ll cover everything from identifying the right capacitor to safely completing the installation. By the end of this guide, you’ll be able to fix your fan like a pro!
Read also:How Long Does Formula Last In A Bottle Everything You Need To Know
Why Does Your Ceiling Fan Need a Capacitor?
Before we jump into the installation process, let’s talk about why your ceiling fan even needs a capacitor in the first place. Think of a capacitor as the "energy booster" for your fan’s motor. It helps the motor start spinning and keeps it running smoothly.
Without a properly functioning capacitor, your fan might struggle to start, spin slowly, or even stop working altogether. If you’ve noticed any of these issues, chances are your capacitor is on its last legs.
Replacing the capacitor is often the most cost-effective solution compared to buying a new fan. Plus, it’s a DIY project that most homeowners can tackle without needing to call an electrician.
What Tools Do You Need to Install a Capacitor?
Before you start tinkering with your ceiling fan, make sure you have the right tools on hand. Here’s a quick list of what you’ll need:
- A new capacitor (make sure it matches the specs of your old one)
- Phillips-head screwdriver
- Wire strippers
- Electrical tape
- Voltage tester (optional but highly recommended)
Having the right tools makes the job much easier and safer. Don’t skip out on the voltage tester—it’s a small investment that can save you from potential electrical hazards.
How to Choose the Right Capacitor
Picking the right capacitor is crucial for your ceiling fan to work properly. Here’s what you need to look for:
Read also:Why Cooking Chips In Lard Is A Gamechanger For Foodies
Check the Specifications
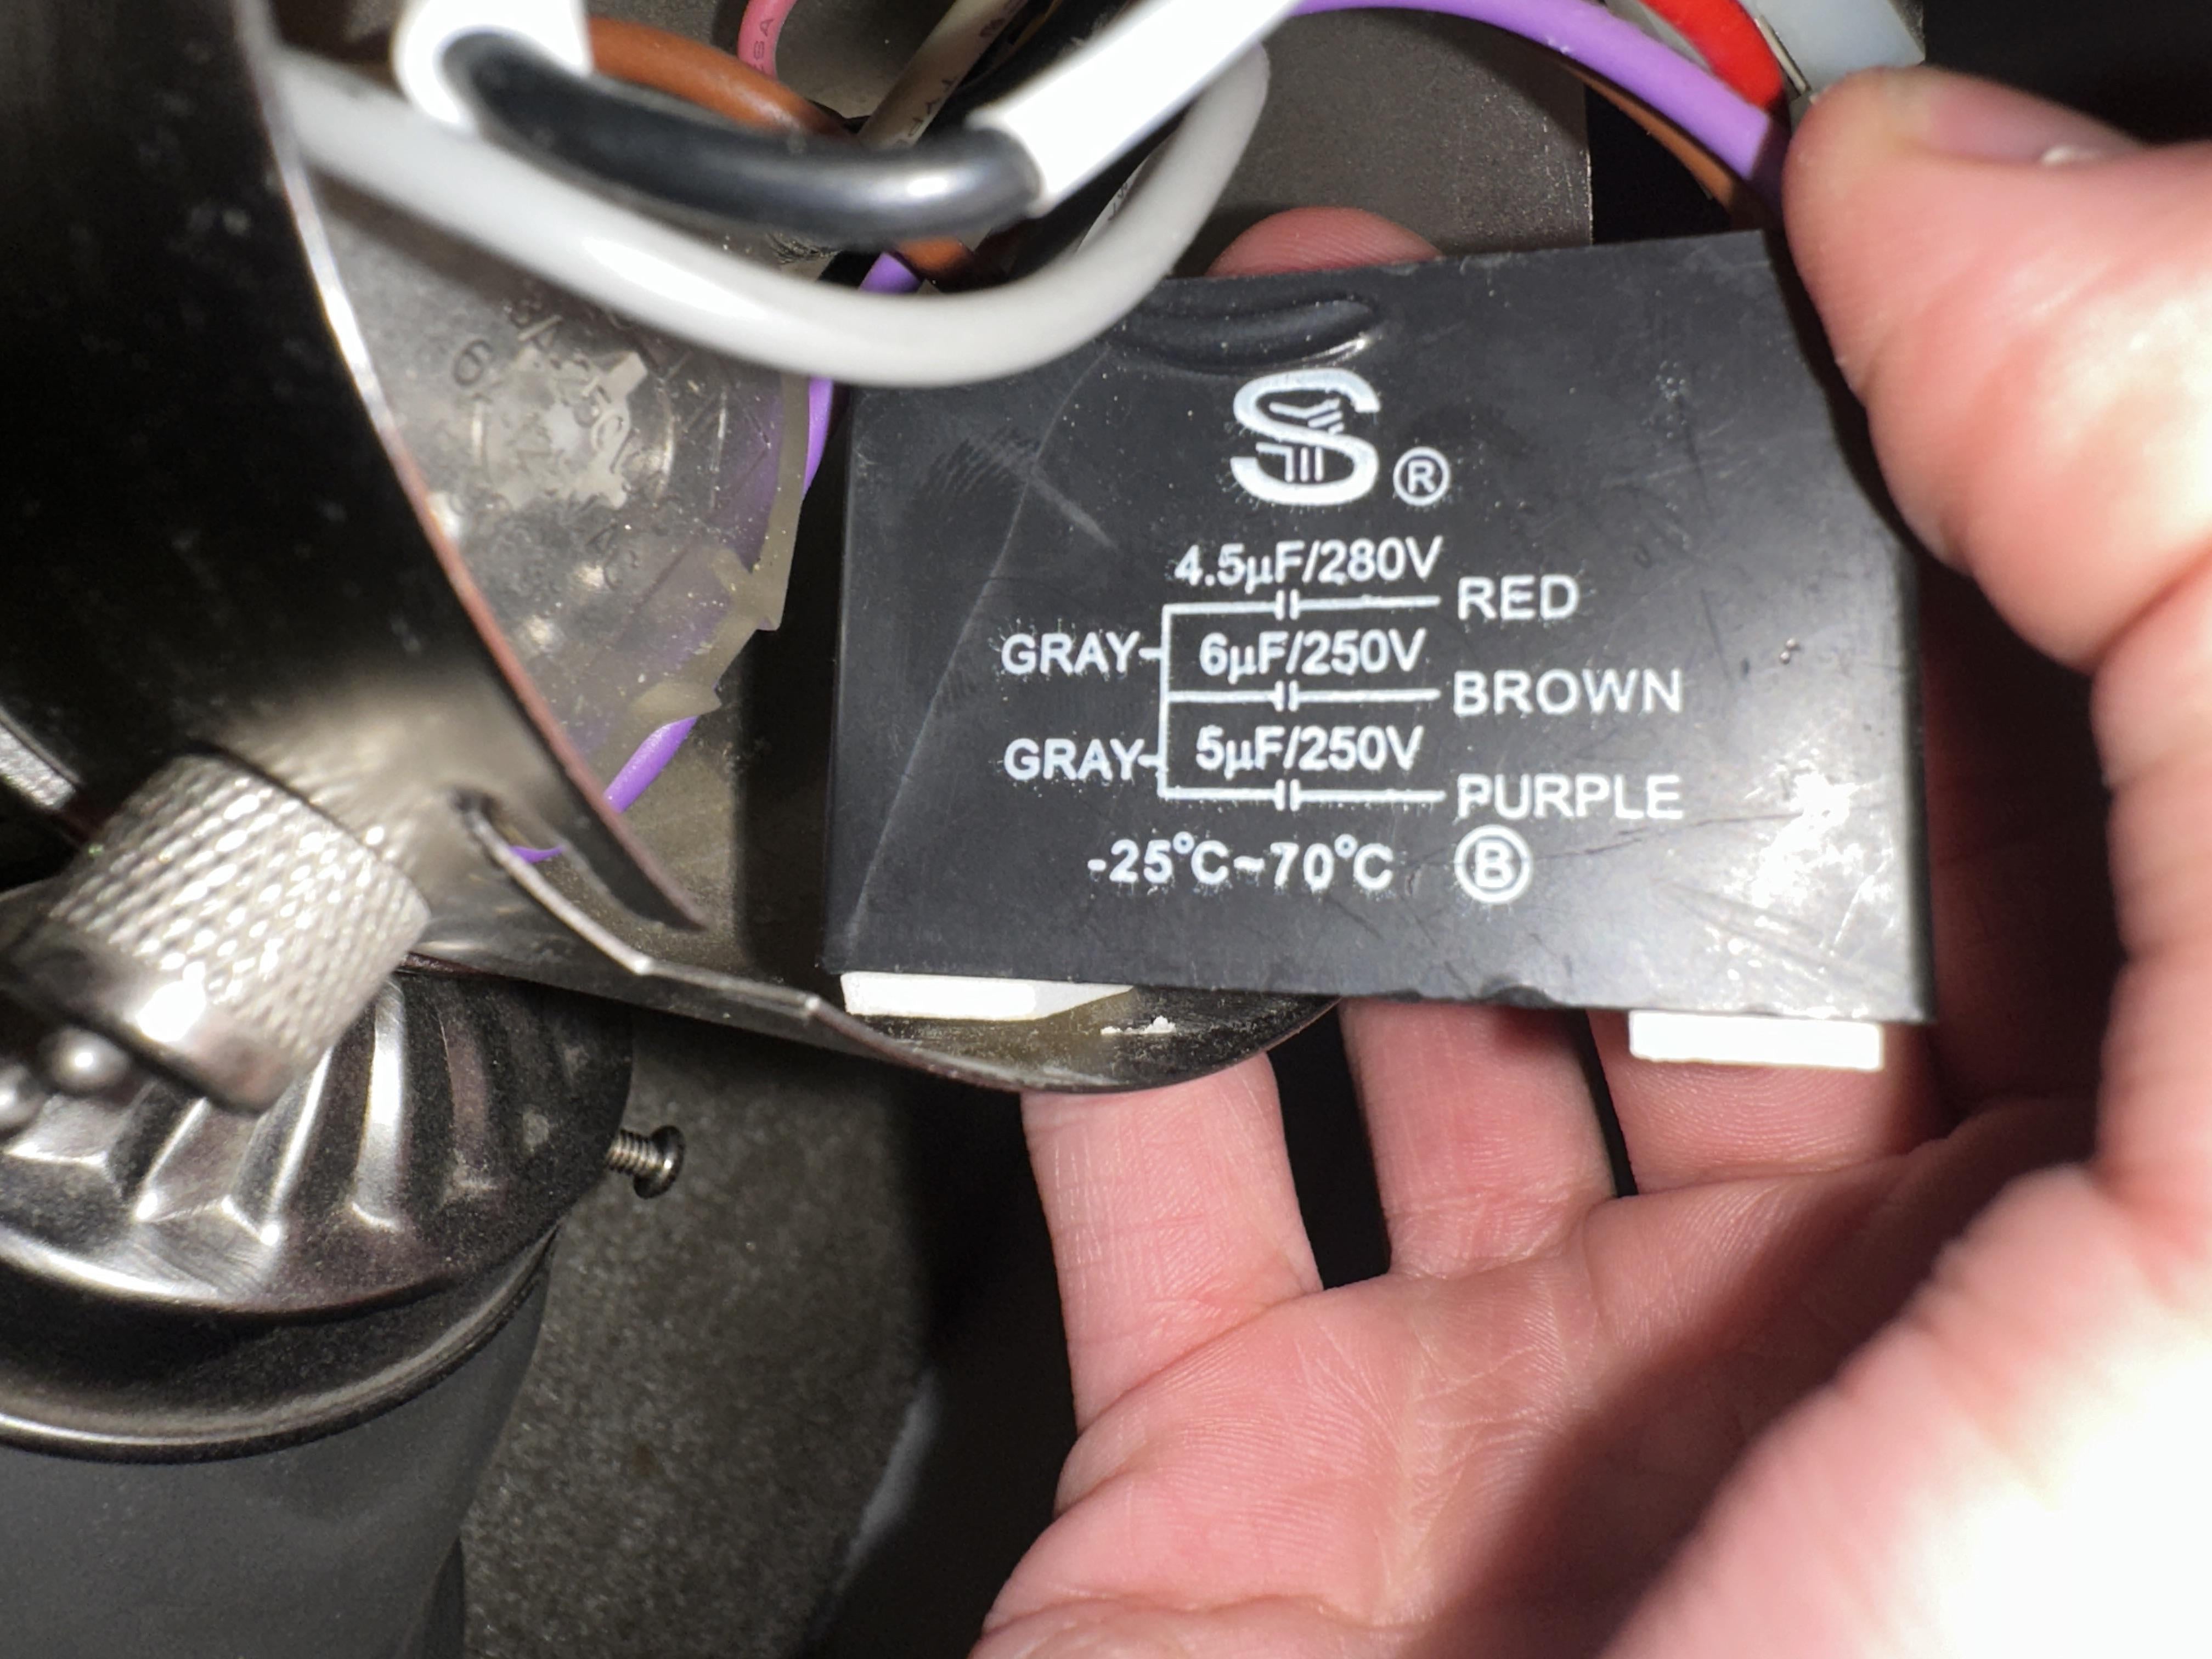
Every fan has specific requirements for its capacitor. Look at the old capacitor (if it’s still intact) and note down the following details:
- Capacitance rating (measured in microfarads, or µF)
- Voltage rating
- Size and shape
If you can’t find the specs on the old capacitor, check the fan’s manual or contact the manufacturer for guidance.
Where to Buy a Capacitor
You can find replacement capacitors at most hardware stores or online retailers. Just make sure the one you buy matches the specs of your old capacitor. It’s always better to get an exact match rather than trying to make something work that’s not quite right.
Safety First: Preparing for Installation
Safety should always come first when working with electrical components. Here’s how to prepare:
Turn Off the Power
This is the most important step! Turn off the power to your ceiling fan at the circuit breaker. You don’t want to risk getting shocked while working on your fan.
Test for Residual Voltage
Even after turning off the power, there might still be some residual voltage in the capacitor. Use a voltage tester to ensure the circuit is completely dead before proceeding.
Secure the Fan
If your fan is hanging low, consider securing it with a bracket or rope to prevent it from spinning while you work. This will make the process safer and more manageable.
Step-by-Step Guide to Installing a Capacitor
Now that you’re prepared, let’s get down to business. Follow these steps carefully to install your new capacitor:
Step 1: Remove the Old Capacitor
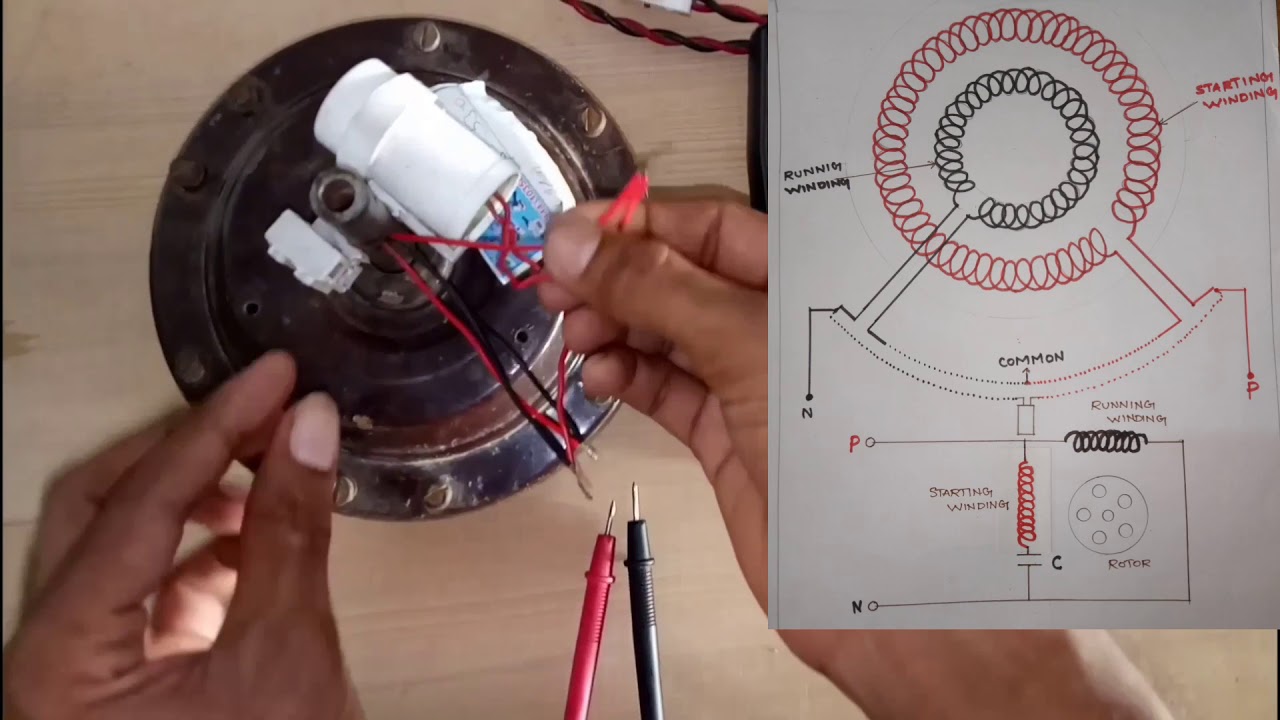
Start by unscrewing the motor housing of your ceiling fan. Be gentle—there might be wires and other components inside. Once you’ve accessed the old capacitor, carefully disconnect the wires. Take note of how they’re connected so you can replicate the setup with the new capacitor.
Step 2: Install the New Capacitor
Position the new capacitor in the same spot as the old one. Connect the wires in the exact same configuration as before. Use electrical tape to secure any exposed wires and prevent short circuits.
Step 3: Reassemble the Fan
Once the new capacitor is installed, carefully reassemble the motor housing. Make sure everything is tightened securely before moving on to the next step.
Step 4: Test the Fan
Turn the power back on at the circuit breaker and test your fan. If everything’s connected correctly, your fan should spin smoothly and quietly. If it doesn’t, double-check your connections and make sure the capacitor is properly installed.
Troubleshooting Common Issues
Even with careful installation, you might encounter a few hiccups along the way. Here’s how to troubleshoot some common problems:
Issue 1: Fan Still Not Spinning
If your fan still won’t spin, check the following:
- Are all the wires connected properly?
- Is the capacitor installed in the correct orientation?
- Is there any visible damage to the motor or other components?
Issue 2: Fan Spins Slowly
A slow-spinning fan could indicate a few things:
- The capacitor might not be a perfect match for your fan.
- There could be dirt or debris in the motor housing.
- The fan blades might be out of balance.
Issue 3: Fan Makes Strange Noises
Strange noises could be caused by:
- A loose or misaligned capacitor.
- Worn-out bearings in the motor.
- Foreign objects trapped in the fan mechanism.
How Often Should You Replace a Capacitor?
The lifespan of a capacitor depends on several factors, including the quality of the capacitor and how often the fan is used. On average, capacitors last anywhere from 5 to 10 years. If your fan starts acting up before then, it might be time for a replacement.
Regular maintenance can help extend the life of your capacitor. Clean the motor housing periodically to remove dust and debris, and check the wiring for any signs of wear or damage.
Cost Considerations
Replacing a capacitor is generally an affordable fix. You can expect to pay anywhere from $10 to $30 for a new capacitor, depending on the brand and specs. Compare that to the cost of buying a new fan, and you’ll see why replacing the capacitor is often the better choice.
Keep in mind that if you’re not comfortable doing the installation yourself, you might need to hire an electrician. However, with the right guidance, most people can tackle this project on their own.
Expert Tips for a Successful Installation
Here are a few expert tips to help ensure a smooth installation process:
- Take photos of the wiring setup before disconnecting anything. This will make it easier to reconnect everything correctly.
- Label the wires as you disconnect them to avoid confusion later on.
- Use high-quality electrical tape to secure all connections. Cheap tape can degrade over time and cause problems.
- If you’re unsure about any step, don’t hesitate to consult the fan’s manual or seek advice from a professional.
Conclusion
Installing a capacitor in your ceiling fan might seem daunting at first, but with the right information and tools, it’s a manageable DIY project. By following the steps outlined in this guide, you’ll be able to breathe new life into your fan and save yourself the hassle of buying a new one.
Remember, safety always comes first. Make sure the power is off, and take your time to ensure everything is connected properly. If you encounter any issues, don’t hesitate to reach out for help.
So, what are you waiting for? Grab your tools, follow the steps, and get that fan spinning again! And don’t forget to share this guide with anyone else who might find it helpful. Happy fixing!
Publix Apron Meals: Your Ultimate Guide To Convenience And Flavor
How To Make A Cross: A Step-by-Step Guide For Beginners
How To Write "Mil Dolares" In English: A Comprehensive Guide
Capacitor Of Ceiling Fan

How To Install A Ceiling Fan Capacitor Shelly Lighting
How To Install A Capacitor In Ceiling Fan
