How To Change Your Nickname On Facebook: A Complete Guide
Let’s face it—Facebook has been around for so long that most of us have probably had moments where we wanted to tweak our online identity. Whether it's because you’ve grown tired of your old nickname, got married, or just want a fresh start, changing your nickname on Facebook can be an empowering move. But here’s the thing—Facebook has rules, and navigating them can feel like solving a puzzle. In this guide, we’ll break down everything you need to know about how to change your nickname on Facebook, step by step, so you can take control of your digital presence.
Now, before we dive into the nitty-gritty details, let me just say this: don’t panic. Changing your nickname or name on Facebook isn’t as complicated as it might seem at first glance. Sure, Facebook does have some strict policies about names, but with a little patience and the right approach, you can update your profile to reflect who you truly are—or who you want to be.
So buckle up, because we’re about to walk you through the process, share tips and tricks, and even throw in some bonus advice to make sure your Facebook experience stays smooth and stress-free. Let’s get started!
Read also:What Is A Tapout Session Tattoo The Ultimate Guide For Ink Enthusiasts
Contents:
- Introduction
- Why You Might Want to Change Your Nickname
- Understanding Facebook’s Name Policy
- Step-by-Step Guide to Changing Your Nickname
- Common Issues and How to Fix Them
- Tips and Tricks for a Successful Name Change
- What if You’re Changing Your Legal Name?
- Using Nicknames in Your Bio Instead
- Frequently Asked Questions
- Conclusion
Why You Might Want to Change Your Nickname
Let’s be real—life happens, and sometimes your nickname or name just doesn’t fit anymore. Maybe you’ve outgrown that playful moniker your friends gave you in high school, or maybe you’ve gotten married and want to reflect your new last name. Whatever the reason, there are plenty of valid excuses to change your nickname on Facebook. Here are a few common scenarios:
- Marriage or divorce leading to a legal name change.
- Growing up and wanting a more professional or mature name.
- Shifting identities, such as adopting a stage name or pen name.
- Wanting to distance yourself from a past nickname that no longer suits you.
Whatever your reason, Facebook allows you to change your name—but there are some guidelines you’ll need to follow. So let’s talk about those next.
Understanding Facebook’s Name Policy
Facebook has pretty strict rules when it comes to names, and for good reason. They want to ensure that users are authentic and that their profiles reflect real identities. But what does this mean for you? Well, here’s the deal:
Facebook requires that your name reflects your true identity. This means you can’t use fake names, offensive terms, or overly creative variations unless they align with your real-life identity. However, there is some flexibility if you have a nickname that’s widely recognized by friends and family.
Key Points in Facebook’s Name Policy
- Your first and last name should be the names you use in everyday life.
- You can include a middle name or initial if you prefer.
- Nicknames can be added in parentheses after your first name.
- Names must not contain symbols, numbers, or unusual capitalization.
For example, if your real name is Johnathan Smith but everyone calls you Johnny, you can update your Facebook name to “Johnny (Johnathan) Smith” without any issues.
Read also:How To Dry Fondant Quickly The Ultimate Guide For Cake Decorators
Step-by-Step Guide to Changing Your Nickname
Ready to make the switch? Here’s how you can change your nickname on Facebook step by step:
Step 1: Log in to Your Account
First things first, log in to your Facebook account using your email or phone number and password. Make sure you’re on the correct account—you wouldn’t want to accidentally change the wrong profile!
Step 2: Go to Your Profile
Once you’re logged in, click on your profile picture in the top right corner of the screen. This will take you to your personal profile page.
Step 3: Edit Your Name
Click the “Edit Profile” button, usually found near the top of your profile. From there, scroll down until you see the section labeled “Name.” Click the pencil icon next to it to edit your current name.
Step 4: Enter Your New Name
Here’s where the magic happens. Type in your new name, making sure to follow Facebook’s guidelines. If you’re adding a nickname, include it in parentheses after your first name. For example: “Emily (Em) Johnson.”
Step 5: Confirm the Change
After entering your new name, click “Save.” Facebook may ask for additional verification, especially if this is a significant change. Be prepared to upload documents like a driver’s license or passport if prompted.
Common Issues and How to Fix Them
Even with the best intentions, things can go wrong when trying to change your nickname on Facebook. Here are some common issues users face and how to resolve them:
- Facebook rejects your name change: If Facebook flags your name as non-compliant, double-check their policies and ensure your new name meets all requirements. You can appeal the decision by providing proof of identity.
- Verification delays: Sometimes, Facebook takes a while to process name changes. Be patient and check back regularly for updates.
- Too many name changes: Facebook limits how often you can change your name. If you’ve hit the limit, you’ll need to wait a few weeks before attempting another change.
Tips and Tricks for a Successful Name Change
Changing your nickname on Facebook doesn’t have to be a headache. Here are some tips to help you navigate the process smoothly:
- Plan ahead: Before making the change, think carefully about the name you want to use. Once you’ve updated your profile, it can take time to notify friends and adjust settings.
- Communicate with friends: Let your friends know about the change to avoid confusion. A quick status update or message can go a long way.
- Double-check everything: Typos happen, so make sure to proofread your new name before hitting “Save.”
What if You’re Changing Your Legal Name?
If you’re legally changing your name—whether due to marriage, divorce, or personal preference—Facebook requires documentation to verify the change. Here’s what you’ll need:
- A copy of your marriage certificate, divorce decree, or court order.
- A valid government-issued ID, such as a driver’s license or passport.
Upload these documents through the verification process, and Facebook will review your request. It may take a few days for them to approve the change, so be patient.
Using Nicknames in Your Bio Instead
Not sure if you want to change your official name on Facebook? Another option is to include your nickname in your bio. This way, friends and family can still recognize you without violating Facebook’s policies. Here’s how to do it:
Step 1: Go to Your About Section
From your profile page, click on “About” in the top menu. Then, select “Edit About Info.”
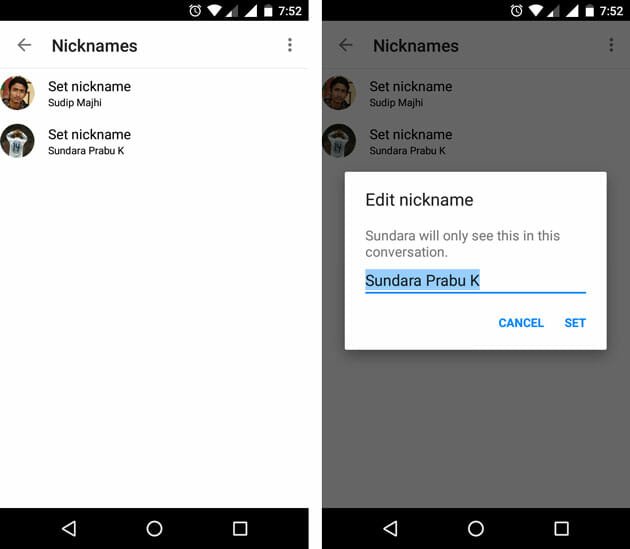
Step 2: Add a Nickname Field
Under the “Contact and Basic Info” section, click “Add Nickname.” Enter your preferred nickname in the provided field.
Step 3: Save Changes
Once you’ve added your nickname, don’t forget to save your changes. Your friends will now see your nickname displayed prominently on your profile.
Frequently Asked Questions
Q: How many times can I change my name on Facebook?
A: Facebook allows you to change your name a limited number of times within a certain period. If you’ve exceeded the limit, you’ll need to wait before making another change.
Q: Can I use a stage name or pen name on Facebook?
A: Yes, as long as the name reflects your real identity and is widely recognized by your audience. Provide proof if requested during the verification process.
Q: What happens if Facebook rejects my name change?
A: You can appeal the decision by submitting additional documentation or explaining the reasoning behind your name change.
Conclusion
Changing your nickname on Facebook doesn’t have to be a daunting task. By following Facebook’s guidelines and taking the necessary steps, you can update your profile to better reflect who you are today. Remember to communicate with your friends, plan ahead, and stay patient throughout the process.
So go ahead—make that change and embrace your new identity on Facebook. And don’t forget to share this guide with others who might find it helpful. Happy updating!
How To Underline On Excel: A Comprehensive Guide For Every Excel Enthusiast
Why Bed Canopy On Wall Is The Ultimate Design Trend You Need To Know About
Marco D'Alessandro Siblings: The Untold Story Of Family, Fame, And Passion

How to Change Nickname on Facebook Messenger on Android 7 Steps
Add Nickname and Change Chat Color in Facebook Messenger

Why you should consider adding a nickname to Facebook
